As instructors, we try to anticipate problems and challenges that may come up in our courses. One thing we sometimes forget to plan for is weather and natural disasters. Do your students know what is expected of them in a situation when class must be cancelled? Of course it is impossible to predict whether our semester will go as planned, or if it will be interrupted by a single ice day or a long term emergency with a disruption to our College of Charleston services like email or OAKS. Jessica Smith, Instructional Technologist for School of Business, blogged about her firsthand experience with a class cancellation last semester. Though we cannot plan for these unexpected events, we can prepare for them. Here are 5 tips to help you prepare for a worst case scenario:
1) Include a statement in your syllabus.
Do you have a statement about cancelled classes in your syllabus? What are students responsible for if class is cancelled due to weather? This statement should include expectations, an alternate communication plan, and information about student responsibilities and adjusted assignment deadlines.
2) Determine alternate communication procedures.
It is possible that there could be a disruption to campus services like faculty email. To prepare for this unlikely event, make sure you keep a hard copy list of student emails, or save a copy of the classlist to your home computer. Other options that some instructors utilize for class communication, even under normal circumstances, include Twitter, Facebook, Celly, and Remind. It may be beneficial to set up these communication systems early in the semester as an experiment to see if it is a good way to communicate with your students.
3) Plan online methods of content delivery.
If multiple class meetings are cancelled, you will want to be familiar with technologies that will make it possible to deliver course content to students. This may involve finding existing media online or creating your own online lecture. The library has resources to help you find suitable media, and TLT is here to help you navigate the technology options for online lecture delivery. Some options include Kaltura, VoiceThread, and Explain Everything.
4) Know OAKS.
Assuming that all systems are functional on campus, but class is still not in session, you will want to be able to utilize OAKS. Do you know how to post content, embed videos, or create a dropbox for student assignments? If you feel that your OAKS skills could use a refresher, contact your instructional technologist to find out about upcoming scheduled trainings or availability for individual consultations.
5) Back up your files.
This is a no brainer. Make sure you are not reliant on access to the internet, OAKS, or email to prepare for your classes. Keep copies of important lecture or course materials on your computer or a hard drive.
If you would like more information about preparing for the unexpected, make sure you attend TLT’s training sessions on these topics. We will cover these tips in more depth. You can register here:
Below are the five most mentioned teaching behaviors identified in the research and from the feedback of online instructors. The ranking begins with the teaching activity that involved the highest time commitment, and descends from there. This is not a scientific analysis, but I included the list to provide an overview of the most prevalent online teaching activities (Van de Vord & Pogue, 2012).
Interacting with students: moderating discussion forums, responding to student emails
Modifying and making changes to course materials and/or course home page
Addressing technical issues/course administration (not including grading)
Tips for Time Management
Handle it once.
Following the principles of the GTD (Getting Things Done) Methodology, manage items as soon as you can. For online teaching, this means doing things in a regimented format. When emails come in, if an answer or action can be done in less than 5 minutes…do it now. If It needs deeper thinking and reflection, mark it in a follow up folder or category before closing it. While reading discussion boards, keep a spreadsheet open so that you can grade as you go and make notes while reading to help keep your students straight. Grade as items arrive and space out due dates to cut down on last minute or end of term grading. Create blocks of time during each day to work on a particular item. For example, Mondays from 10-11 am I work on items strictly for the mentors. Everyday from 830-930 am I answer emails from participants about course related issues. Thursdays from 1-4 are spend grading specified assignments. Making this set schedule for yourself will make sure that you are allowing ample time to focus.
2. Respond to students efficiently.
If a student asks a great question via email, reply to them and ask them to post their question and the response to the class, but if more than one student has emailed about the same issue or set of instructions, then address the group as a whole with a news item, whole class email, or something else that will make sure that all students see the information. For example, if there is a procedural problem (students not knowing how to do something in a class) create a short video or screencast to walk them through the process.
3. Make Time Count.
If it’s something that a student won’t notice…don’t do it! If it’s something the students can do for themselves or with each other…delegate or provide opportunity to do it. For example, a Course Lounge or question forum will allow students the ability to answer each other. You can back this up by adding an “ask 3 before me” type policy so that you know they’ve tried to find help on their own first. To make this efficient, you need to mindfully not engage in what one professor called “Whack a Mole” facilitation, where as soon as a discussion post or a question comes up the professor logs in to answer it or replies immediately. Make sure you give your students that time to help each other or they will become accustomed to that immediate feedback and you’ll spend all your time responding to email.
4. Get Organized: Location, Location Location
Have your course follow a logical path so that not only you but your students also know exactly where to go and what to do. The easier it is to find something, the less time you spend looking for it! This is especially applicable to the syllabus. The more text heavy and exhaustive your syllabus, the less likely your students will be able to find what they need in the process. Try breaking your syllabus up into sections and bulleting information rather than using paragraph texts. Have your students engage in a scavenger hunt or quiz to show that they understand the key pieces of the document before the class gets too far underway. This will lead to less questions and less time emailing “it’s in the syllabus”.
5. Get Organized: Me, Myself, and I
Make sure that your workspace is organized and ready to go. This includes your computer! If you have a hard time finding files or folders on your machine, take some time to organize your files so that you can easily grab an item when it is needed. Keep a list handy of places you can go to for help. Obviously TLT is going to be number one (:)) but make sure that you add your librarian, CDS, CSL, and other campus resources and how to contact them.
6. Develop a routine and electronic minions
There are a lot of moving parts in an online classroom. Some can be automated, some cannot. First, make a list of all items that you need to do (that you know of) and due dates prior to the course starting. Identify any weekly activities and blocks of time you’ll need to answer emails, grade, respond to discussions, etc. If an item can be automated (for example, a news item reminder about a test that you want to go out on a certain date) go ahead and create the wording and release conditions before the class starts. In the immortal words of Ronco…set it and forget it! For those items that can’t be automated, create calendar reminders or use a task management tool that contains reminders like Asana.
7. #Unplugged
In honor of the TLT Lifetime DE Mentor award recipient Lancie Affonso, we bring you this most important tip. Unplug every now and again! Take some time away from the screen and technology to engage in the world. It is tempting to want to be logged in 24/7 when your students are in session, but taking some time to take care of yourself (and your eyes, back, and wrists) will benefit you in the long run as an instructor.
8. Use the right tools for the job.
Technology can do so much to help with time and task management, as well as automating parts of your responses without losing that personal touch. Talk to your instructional technologist about some of the options to help you with time, task, grading, and communication management for your online class. Check out this article on how to go about choosing the right tool for your situation: http://blogs.cofc.edu/tlt/2014/03/05/plan-attack-implementing-technology-instruction/
9. To Thine Own Self Be True
“Each person has a daily cycle when he or she is most alert; schedule that time for online work. Determine the best time of day to check and respond to email. Flag and prioritize emails. Realize that what is an overload for some instructors is not for others. Before accepting teaching assignments, look at the other assignments already accepted for that semester and consider whether the workload is too heavy. Factor in family obligations and planned vacations when considering personal work capacity. When planning for the future record notes each week in a teaching journal identifying thoughts about revisions for the next semester. Some fixes like broken links can be done on the fly during the current run, but others, like the rewriting of a section, need to wait until the students are no longer present. At the end of the semester, reflect on the notes and adjust as needed.”
10. Practice your online writing
Because writing is a major channel of communication in an online class, the importance of clear and concise writing of the course materials cannot be over-emphasized. If one student finds a sentence unclear, the instructor will need to spend valuable additional time responding to clarify. Five or ten minutes of additional time for polishing a message or task instructions before distributing or publishing may save hours in clarifying later. Have someone who is not familiar with an assignment read the instructions and see if it makes sense or if they could do the assignment with the information you provided. Keep a list of frequently asked questions and your responses. You can then copy and paste your responses or keep a running list published in a Google Doc that would get updated in real time for your students and would be easy to search for keywords.
11. Design with Accessibility in Mind
Too often faculty members will design an online course and then realise a semester later that they have a student with a disability in their courses that require accommodations (screen readers, subtitles, alternative formats, etc.) While it may take more time as you build the course, designing your course to be as accessible as possible from the start will save you more time (and you will reach more students) than trying to scramble after you get an accommodation request letter. Remember, it is easier to construct than to retrofit a class!
Our guest blogger this week is Dr. Adem Ali, an assistant professor in the Department of Geology and Environmental Geosciences. Dr. Ali attended the Faculty Technology Institute in 2014. In this post, Dr. Ali describes his strategies and success using Poll Everywhere in his courses.
Poll Everywhere is an adaptable and now a popular tool that we have a campus license for at the College of Charleston, which makes it free for college instructors to use and makes it possible to use in large classroom settings. After my training at the Faculty Technology Institute during summer of 2014, I immediately implemented Poll Everywhere into my courses and lectures. Since, I have enjoyed using Poll Everywhere and it has increased the level of students’ interest and engagement, transforming the course into active learning. The courses I teach have class sizes ranging from 25 in my higher level elective courses to over 100 in the general education classes.
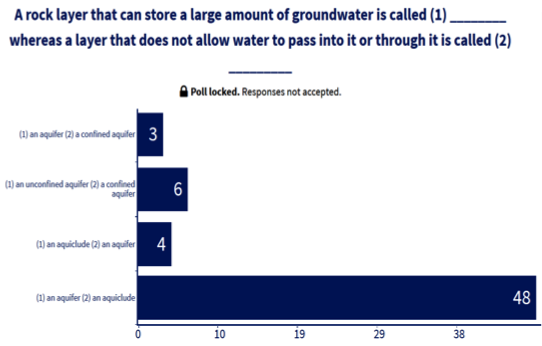
I use Poll Everywhere to create conceptual questions in multiple formats that can be answered by students instantly and LIVE. I embed the Poll Everywhere polls/questions into my PowerPoint presentations throughout my lectures, and the students can answer by going to a webpage using their laptops and clicking the answer, texting an answer to an SMS number using their smart phones, or by tweeting. This capability has allowed students to use web and cellular devices. It has made the learning experience more flexible, and it has brought it into their world making learning more fun and engaging.
One of the advantages of using this tool is that it allows you to embed the poll/questions into your existing presentations, like PowerPoints. I found this to be very important because it made my lectures more engaging without requiring me to spend a lot of time. I simply included the poll slides throughout the lecture slides. The tool allows the students to watch the answers as they are coming in live. As an option, the live answers can also be hidden until all students have participated, providing the flexibility to adapt to polls for discussion points or to use them as quizzes for assessment. Poll Everywhere also provides the number of responses, providing evidence for level of classroom engagement.
Another important aspect of Poll Everywhere is that it allows the instructor to immediately see the level of comprehension of content based on the response patterns on the polls/questions, providing instructors with the opportunity for giving instant feedback. In my lectures, these capabilities have allowed me to quickly identify content/concepts that were not grasped by the students and we could spend more time discussing misconceptions, and at times revisit topics to help students refine their understandings.
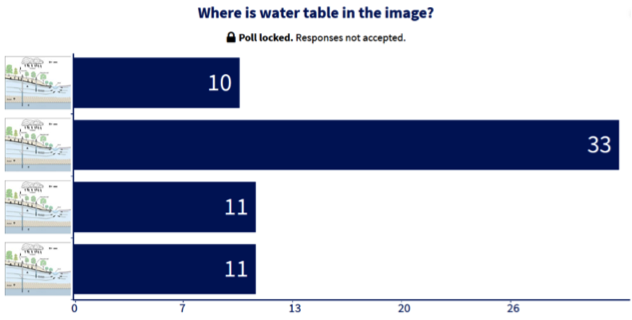
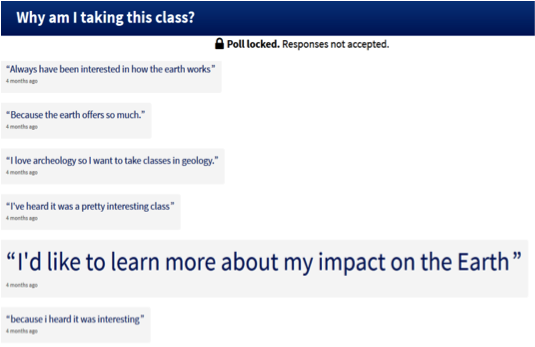
Here are some examples of my Polls:
A multiple choice poll with student responsesA free response poll
I have also used this tool as an attendance record by posting simple questions as a segue to the lecture of the day. I used the attendance data generated by Poll Everywhere for grading individual students on their class participation in the final grade rubric.
The challenges I experienced when using Poll Everywhere all related to student mobile device issues – students with smartphones were unable to participate in certain types of polling and students with restricted phone plans had texting limitations.
Overall, I think Poll Everywhere is a great tool for student engagement and assessment. I plan to continue to use this tool in my future classes to promote student engagement in lectures and also to refine or revisit topics of discussion to maximum students’. To learn more about the College of Charleston Campus license for Poll Everywhere, please visit http://blogs.cofc.edu/tlttutorials/2013/09/10/poll-everywhere/.
Our guest blogger this week is Dr. Kristin Krantzman from the Department of Chemistry and Biochemistry. Dr. Krantzman attended the Faculty Technology Institute in 2014. In this post, Dr. Krantzman recounts her experiences using Poll Everywhere to provide students with opportunities to work on practice problems during class.
Poll Everywhere is a program that allows an instructor to give interactive polls over the internet without requiring students to spend additional money on special equipment. I decided to try using Poll Everywhere as a supplement to my traditional lecture in two sections of the general chemistry course, CHEM 112. CHEM 112 is the second in a two semester introductory course that is taken by students in the sciences, and my enrollment in Spring 2015 was about 45 students per section. This course has an introduction to chemical equilibria, reaction kinetics, entropy and free energy. Fundamental concepts are applied to acid-base reaction, precipitation reactions and oxidation-reduction reactions.
A primary challenge in my course is that many of the concepts in the class are abstract and mathematical. As a result, many students do not immediately understand the material when it is presented. Students are focused at the beginning of class, but their attention decreases when they cannot follow what I am talking about in class. Students need to work out problems in order to learn the material. But, there are many topics to cover over the semester, and there is not much time in class for students to practice problems. Another problem is that the final exam is all multiple choice questions, but the practice problems that students do as homework in the textbook are short answer. I decided to give students multiple choice questions with Poll Everywhere as a way to engage students and allow for practice. I chose to do this because I thought that students would learn more if they were required to think about questions and respond in class. Students showed a greater understanding of the material and improved their ability to answer multiple choice questions.
Prior to class, I wrote the multiple choice questions in Poll Everywhere. One strategy I used was to post a Poll Everywhere question for students to work on as they entered into the classroom. Previously, this time was unused because I could not start class early and we had to wait for all of the students to get settled. This question was on a topic that we had covered in the previous class. This review reinforced student learning. In addition, I often gave students another question to answer, either halfway through class or at the end of class. After the students had answered the question, I displayed the response results. If the majority of students did not respond with the correct answer, I asked the students to discuss the question with each other and then respond a second time. After reviewing the responses, I went over the correct answer and explained why the other answers were incorrect. I chose to put some of the Poll Everywhere questions on the in-class tests, which motivated students to study them.
The students showed a dramatic improvement on the final exam, with average scores increasing by 7% from the fall semester. The students responded on the course evaluations that they liked the Poll Everywhere questions because doing them in class helped them understand the material. They also enjoyed the class more when I broke up the class lecture by having them work on questions that they had to actively work through.
My advice to other faculty is to have the answers to the Poll Everywhere questions count towards their grade and write this into the syllabus. Students could be given credit for answering questions even if they are not correct, which would reward students for attending class and actively participating.
Our guest blogger is Robin Humphreys from the Department of Geology. Robin attended the Faculty Technology Institute in 2014. In this report, she details her experiences modifying lecture materials to meet the needs of a visually-impaired student.
Teaching introductory courses has many challenges, such as how to keep student attention in a large lecture hall, engage in meaningful dialogue with more than just the students in the front row, create assignments that are insightful and challenging but can be graded in a timely manner, etc. During the FTI workshop of Summer 2014 we were introduced to many different ways to use technology, such as Poll Everywhere, Kahoot!, and PowToon, in our classrooms to help overcome many of these types of challenges and create stimulating, engaging learning environments. After our week-long workshop, I left the course very inspired and excited to incorporate these new ideas into my introductory Geology lecture courses for Fall 2014.
What I did NOT anticipate was having a visually-impaired student – totally, 100% blind – in my class. So…how do I incorporate technology we learned from the FTI that requires being able to see, such as PollEverywhere, Kahoot, and Powtoon, into a format that is accessible to everyone, including someone who cannot see? Not only did I have to rethink how I presented the material (I primarily use PowerPoint and the Whiteboard for my lecture discussions), but now I had to design lectures and in-class activities for someone who cannot see me, the PowerPoint presentation, or the whiteboard. I quickly had to rethink my approach of using cutting-edge technology in the classroom and went for more of an ‘old-school’, low-tech, hands-on approach.
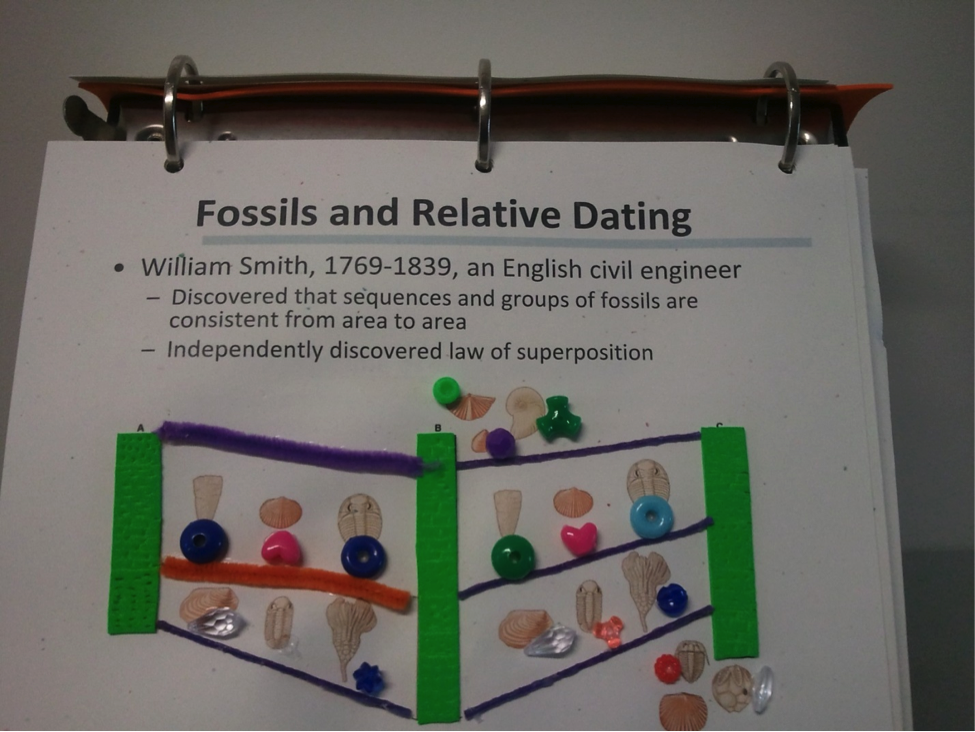
So, how do you describe the Grand Canyon to someone who has no depth perception or concept of scale? To help our student understand the basic concepts and principles of geology, I sought the expertise of Dr. Cassandra Runyon, who has been developing materials for visually-impaired people through her educational NASA workshops for over twenty years. Dr. Runyon created tactile models of the images from my lecture presentations, using an incredible variety of different types of materials (e.g. corrugated paper, beads, foam, felt, etc.). Below is an example using various beads to indicate different fossils within sediment layers in stratigraphic columns. While extremely time-consuming to make, these low-cost and most definitely low-tech models were very instrumental in helping the visually-impaired understand and ‘see’ how Earth works.
Materials for visually-impaired students
Additionally, I recruited several senior geology majors to help me both during class and outside of the classroom. During class, the geology seniors quietly explained the images or graphs on the PowerPoint slides as I was discussing the concepts. To help the visually-impaired student ‘see’ the slides, the geology majors would make simple sketches of the images, using a special type of drawing pad that would transfer the sketches into a raised format that makes it possible to ‘see’ via touch. Generating these simple tactile sketches in real-time was a very effective method of helping the blind student ‘visualize’ the concepts being taught. Outside of class, I provided the geology seniors with copies of my lecture PowerPoint presentations. The geology majors provided verbal descriptions of each and every image, graph, or video in every one of the PowerPoint slides, using the ‘ALT TEXT’ option provided in PowerPoint –an incredibly time-consuming task (see example below). I quickly realized by week two of the fall semester that I did not have the 6-10 hours it was taking for each of the Powerpoint lectures! Fortunately, I have a very supportive department chair, Dr. Mitchell Colgan, who allowed me to hire students to provide the PowerPoint slide alternate text accessible by screen readers. I was very grateful, as the ‘ALT-TEXT’ option in PowerPoint was very instrumental in helping our visually-impaired student understand the images and concepts.
Adding alternative text to PowerPoint slide
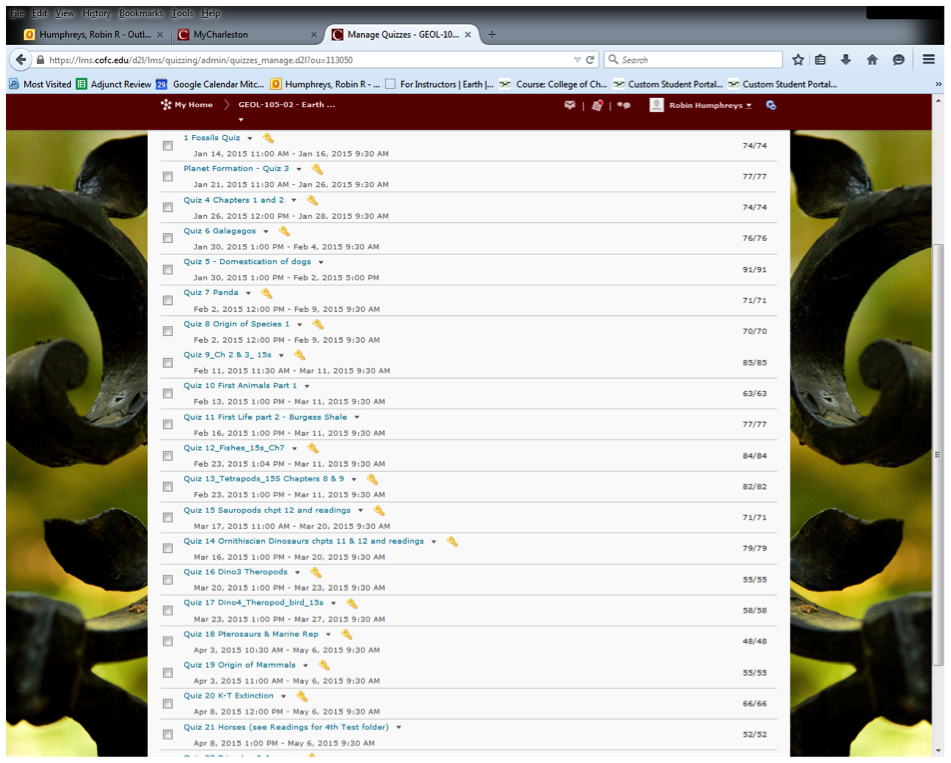
In all of my courses, I have the students take daily quizzes on the upcoming lecture material prior to each class period, in addition to in-class quizzes and/or activities on prior lecture material. These daily quizzes, both in and outside of class, have proven to be quite helpful in both student understanding and retention of the lecture material as I have noted increased exam scores and positive student feedback. I use the College of Charleston’s online learning management system, OAKS, as a tool for providing the lecture materials, readings, and online quizzes (see OAKS quiz list below). My visually-impaired student rarely had difficulty using OAKS and was successfully able to navigate the quizzes and course materials.
Screenshot of OAKS Quizzes, a tool that works with screen readers
I had planned on integrating the new technology learned during the FTI, such as Poll Everywhere and Kahoot!, for the in-class quizzes, but quickly realized these programs would prove to be difficult for someone who cannot see. I resorted to the old-fashioned paper-and-pencil method for my in-class activities instead. I hope to try the new programs, such as PowToon and Kahoot!, along with Poll Everywhere, in the Fall.
One of the other ways of helping our blind student ‘visualize’ was to provide models of the fossils we were discussing. However, many of our fossil samples and models are too fragile to be handled. Kaitlin Woodlief and I tried to make a 3D print of one of our dinosaur models (Triceratops), using the new 3D printer. This process had several issues, primarily with having to generate the 3D scan file, rather than using a file already made (see image below). We are going to continue trying to find ways to make 3D copies of these fragile models for the upcoming year.
A screenshot of the program used to create a 3D triceratops
In summary, while I was eagerly anticipating incorporating new learning technologies and strategies learned in the FTI workshop of 2014 into my Fall 2014 and Spring 2015 courses, I was not able to do so due to the presence of a visually-impaired student in my classes. I relied heavily on low-tech models and pen/paper for helping teach the visually-impaired student. I hope to incorporate the new technologies in my courses this fall (2015), even if I have a course with another visually-impaired student as some models and groundwork are already prepared.
Lastly, I want to point out how much I learned, and benefited, from the experience of teaching such a visual subject as Environmental Geology and Earth History to someone who cannot see. It was an eye-opening (pun intended!) experience and a challenge I found enormously rewarding!
Our guest blogger is Kathleen Janech from the Department of Biology. In 2014, Kathleen attended the Faculty Technology Institute. This blog post is a report and reflection on implementing strategies and technologies from that workshop. Kathleen describes her endeavors to make her lectures more interactive through gamification, and she discusses moving some lecture content online to create time for activities during class.
I decided that I wanted to update one particular section of my Biology 102 course. This is a course for non-majors, and I chose to update the section of the course where I teach about animal diversity and evolutionary connections. This is always a section that students report that they enjoy, but as much as I love all of the diversity seen with animals, I have found that teaching it has become boring. I also used to have a 5 question section at the beginning of the exam on animal diversity, where they would see a picture of an animal for 30 seconds and then have to pick the correct identification in a multiple choice question. Although I like to think that this made them use the knowledge they had acquired, it seemed to just stress them out more about the exam, and being a summative assessment, came too late for them to correct their perceptions.
Therefore, I decided to try a few new things with my class of 35 students in the Spring of 2015. There were so many great ideas that we were exposed to during the FTI, but I had to focus on one area that I could really change in one semester. Overall, I tried to “chunk” my lectures more, and alternate the presentation of material with short videos or a discussion of a handout that they could take home. I would also post more lecture material on OAKS, resulting in a partially flipped classroom. A great advantage of this was that it freed up great amounts of time so that I could fit more activities into the class. The students could access my lecture material at any time, and go over it as much as they needed to, which is great for those who cannot write as fast as others.
In practice, I posted more of the background information on animals (characteristics that were in lists, which had made lecturing on them very boring) on OAKS, where students could access it on their own any time. With the available class time, I planned to try two ways of in-class formative assessment in the form of games. The first game that I tried was “Who Am I?” as a hook at the beginning of class. The students had a lot of material in their notes from class and from slides that they were supposed to have looked at on OAKS. I asked for 3 volunteers, one at a time. When each came to the front of the room, I taped the name of a classification category to their back (such as Phylum Mollusca, or Class Polychaete). They showed it to the class, and then had to turn back around and ask questions of the class to try and guess what category was on their back. Some advantages were that only volunteers were really “on the spot” at the front of the classroom, and the rest of the class could look at their notes to help them out. And it gave them some in-class time to actually try to use the information from their notes and work with it to apply it to something, instead of just waiting to be tested on it. Also, there was not a lot of prep required on my end, aside from writing up and taping the signs on their backs. The disadvantage was that I realized that I had to be very specific about the way they could ask questions of the audience, since I was trying to get them to use the categories that I had presented in class.
The second game that I tried was Kahoot! I used this at the beginning of the class as a hook or “kindling” to get them engaged in the topic. This was by far the biggest success of this section. One advantage of it was that the students really enjoy getting to use their devices in class (and it is a special treat since I do not usually allow devices to be in use during class time). Another advantage was that students were engaged because it was a competition, which they enjoyed, but also something that they could do anonymously so if they made a mistake they could learn from it without having to be embarrassed. Disadvantages include the fact that everyone needs a device on which to play, and not everyone will always have one (they were not penalized if they could not participate), and this took a lot more preparation time for me to get questions ready and make sure that they were good questions. Since Kahoot! was a formative assessment, it let the students know where they were with the material.
Students commented that they really liked my “chunking” strategy – they appreciated seeing short video clips of the different animals and examples of behavior, since it really brings the colors and movement alive, and it helped to break up the lecture. They also noted that they liked having the links to watch later. The “Who Am I” game was not as popular, maybe because I did it earlier in the unit and none of them knew the material yet, and they felt like they were on the spot. The Kahoot! game was really popular. They liked the anonymity, and it was suggested that we play it more often to keep up with all of the material. They liked the competitive aspect and the fact that it was interactive for everyone. Many students commented that they thought they knew the material, but after playing they could see where they needed to do a lot more studying.
In the future, I am going to try to incorporate Kahoot! from the start in all my classes. And, if I prep it far enough in advance, I can include images as part of a question, which will be great and especially applicable for this animal section. I hope to use VoiceThread to free up more time in class for activities and games. I would like to try to work on a “lecture organizer” structure that could be a handout or drawn on the board on the first day of class, in order to help students categorize and prepare for unfamiliar material. In addition, I might try to using Poll Everywhere at the beginning of the class as “kindling” to see how much background information they already know about a particular group, or with a video when I want them to guess what animal I have shown. This would be great to see how much they already may or may not know about many of our local animals. I am going to continue to try and rethink sections of my courses, and incorporate more new ideas. I know of one place in my Biology 111 course where a flipped classroom model would work really well, so that is what I will work on next in the fall.
Thank you, FTI and TLT, for lots of great new ideas!
Multiple choice question creation is challenging and time-consuming. While question banks from the publisher can certainly benefit students by providing opportunities for practice, I prefer to create my own questions for exams to make sure they align with my learning objectives and the material I emphasized in class. While one of the main benefits of using multiple choice questions is the ease and speed of grading, one of the drawbacks is the amount of time invested in the development of each question. Various sources report that professional test item writers spend 30 minutes to 1 hour on just the first draft of a multiple choice question (1, 2). In some ways these numbers are reassuring as I know I am not alone in my occasional struggle with creating plausible distractors (choices) and targeting higher level thinking and reasoning.
During last week’s Faculty Technology Institute, TLT offered a session on best practices to improve multiple choice questions and exams. A number of tips resonated with the participants and led to a vibrant discussion. With multiple choice questions being so common, I thought the rest of the college community might gain new ideas from some of these discussion points. The summer is the perfect time to look back on exams from the past year and evaluate their effectiveness at measuring student learning. You might consider carrying out an item analysis on some of your questions to evaluate the difficulty and discrimination (3). Here are a few practical things to consider if you plan on revising your multiple choice questions:
3 options are optimal (in most cases).
A meta-analysis of over 80 years of research concluded that 3 options, or choices, are optimal for multiple choice questions (4). The analysis examined item difficulty, discrimination, and reliability and concluded that 3 options is best in most settings. I found this paper fascinating, and I was pleased to find out that I can spend less time trying to come up with plausible distractors for each question, while at the same time reducing the reading burden for students. Wahoo!
Parts of a multiple choice question.
Question order does not influence performance or completion time.
The majority of research on this topic indicates that question order has no effect on performance or completion time (5). This is great news as scrambling question order is one strategy adopted by many instructors to prevent cheating. Interestingly, students may perceive exams with randomly ordered questions as more difficult than chronologically ordered exam questions (5). This might be something to keep in mind if you often hear from students that your exams are really difficult.
Following all the item writing recommendations is really hard.
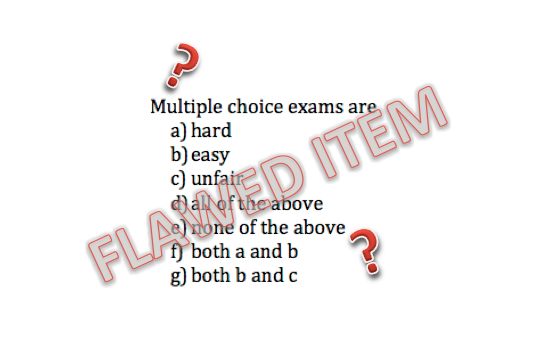
Avoid absolutes (always, never, all, none, all of the above, none of the above, etc).
Avoid negatives (all of the following except, which of the following is not true, etc.).
I know my past exams have included “none of the above” or “all of the above” as options. Faculty attending TLT’s sessions on writing multiple choice questions have commented that these recommendations can be hard, sometimes impossible, to follow. I am hoping to reduce my item flaws by cutting question options down to three.
Poorly constructed questions and exams negatively affect students, and they interfere with interpretations of the exam results. As an instructor, I want to make sure that my questions are reliable and valid. In addition to wanting my exams to align with my learning objectives, I want my exams to be a reflection of student learning in my course and not a measure of reading ability or test-taking savviness. The recommendations listed above have led me to rethink my exam format and reconsider some of my test questions. I hope they are useful to you too!
(1) Van Hoozer, H.L. (1987). The teaching process: theory and practice in nursing. Norwalk, Connecticut: Appleton-Century-Crofts.
(4) Rodriguez, M.C. (2005). Three options are optimal for multiple-choice items: a meta-analysis of 80 years of research. Educational Measurement: Issues and Practice, 24, 3-13.
(5) Pettijohn, T.F. and Sacco, M.F. (2007). Multiple-choice exam question order influences on student performance, completion time, and perceptions. Journal of Instructional Psychology, 34, 142-149.
We have reached that glorious time of year when students are starting to plan for the future (i.e. – register for Fall semester). As we wrap up the current academic year, you may start thinking about the future yourself. What courses will I be teaching next year? How will I do that? What assessments am I going to use? What am I going to change up? Wouldn’t it be cool if {insert innovative idea here}? While TLT is here to help you with all of your planning needs this summer, there are a few things to keep in mind while you make plans for your future courses, especially in terms of meeting the needs of all learners.
College of Charleston currently has approximately 900 students with various disabilities on campus who are registered with the Center for Disability Services. [1] Some of you may have already worked with students with disabilities in your courses and have a working knowledge of accommodations. For others, this concept may be new and foreign to you. In any case, as you look to prepare your courses for future semesters, here are some overall tips that will help you to design with accessibility in mind:
Think about the whole process more as Accessibility rather than Compliance. When you hear someone bring up the topic of working with students with disabilities, you often hear it referred to as ADA Compliance. Just that phrase can conjure up images of lawsuits, courtrooms, and “early retirement”…but it doesn’t have to be that way! True, there are federal requirements that are outlined in the Americans with Disabilities Act, reauthored in 2010. What it all boils down to is making sure that each student in your course has equitable access to the information and participation. When you think about it, that just makes sense! Why would a student be in our courses? To learn. How can we help them learn? By giving them the opportunity to do so. To learn more about what this means, check out this video on Web Accessibility as it pertains to College of Charleston.
It is much easier and less time consuming to design a course to be accessible from the ground up than to try and retrofit it later. Sometimes, you’ll hear a faculty member say “I’ll worry about that IF I have a student who needs a disability in my class”. However, as one professor who recently had a student with visual impairments in her class put it, “I realized at that point it was too late. I had to struggle to get all of my material together and put into a format that the student could use. Add that on top of not knowing what that meant or looked like and all of the responsibilities of the semester. I was stressed out, the student was falling behind, and it wasn’t really their fault! I just hadn’t thought about it.” Many of us will be teaching courses that we’ve taught before, so how can we start looking at accessibility issues and fitting in pieces that fit? Which leads us to…
Consider using Universal Design for Learning principles as you redesign parts of your course. “Universal design for learning (UDL) is a framework to improve and optimize teaching and learning for all people based on scientific insights into how humans learn,” (CAST 2015)[2]. Structured to help all learners in your courses, not just students with disabilities, this framework for curriculum design is based off of three primary principles:
Multiple Means of Representation: Present information in different ways so that all learners can access the information. Look for flexible ways to present what you teach and what you want the students to learn. Consider using visual and auditory elements, experiential learning, and kinesthetic opportunities to engage with content.
Multiple Means of Expression: Provide ways for students to show what they know and what they can do using multiple modalities. Project Based Learning is a great way to do this by giving students a forced choice menu of final product options and adding in a reflection piece.
Multiple Means of Engagement: Consider using different “hooks” or “activators” to capture your students’ attention to the content and hold it. Remember, relevance is key!
Universal Design for Learning is a vast and useful framework for reaching all learners and to individualize the learning process to meet their needs and your course goals. I would suggest checking out some of the additional resources below if you are interested in learning more about the theory.
To learn more about HOW to do this, including examples from current faculty, stay tuned for Designing with Accessibility in Mind, Part 2: The Practice (Coming in May…debuting just in time for your summer course planning!)
Additional Resources
When using these principles there are a variety of resources available to help you out. Here on College of Charleston’s campus the Center for Disability Services is a wonderful resource for faculty. TLT can also help you differentiate your instruction and research academic-related technology solutions to implement. Here are some other resources to help you out:
Movie Captioner Update:
Movie Captioner is an easy to use caption creation application to which the College of Charleston owns a site license. You and your students can use this application to closed caption any audio or video files. For the installer file and the license number please contact your instructional technologist.
If you are currently using Movie Captioner, a site license at CofC, there has been a recent update. Please contact your Instructional Technologist for more information on how to download the new version.
On Tuesday, the College of Charleston experienced a safety and communication crisis when a bomb threat was made. Classes in six buildings were officially cancelled and many faculty, staff, and students were prohibited from accessing their offices, classrooms, and dorms until 5:00PM. This unexpected disruption caused many professors to lose valuable class time.
As the daughter of a Boy Scout and a Girl Scout myself, I try to live by the mantra: be prepared. As an instructional technologist, I’ve learned ways to use technology to “prepare for the worst” and want to share that knowledge so you will be ready for the next interruption, closure, or disaster.
1. Think ahead. Before the semester begins, decide how you will manage if classes are cancelled. According to instructional technologist, Kaitlin Woodlief, “your best preparation is to learn the tools now before you’re put into a situation where you have to use them.” This doesn’t mean you must become an expert on Adobe Captivate to make professional-quality video lectures. Instead, familiarize yourself with one tool so you feel comfortable enough producing something simple that will transmit content.
Given Tuesday’s events, I had to figure out a way to prevent my students from getting too far behind. I uploaded the Powerpoint I intended to use in class into Voicethread and narrated my slides using already created lecture notes. I didn’t need to create new content; I just had to put that content into a different format. And because I had already familiarized myself with Voicethread, the process was simple. There are numerous tools that will allow you to deliver content online in case of a College closure or class cancellation, including Kaltura, Jing, Screencast-O-Matic, EdPuzzle, and Google Drive. Of course, TLT has you covered with workshops that focus on online content delivery! Browse tlt.eventbrite.com for those sessions.
2. Include a syllabus policy. As you prepare your classes, craft a policy that establishes expectations and procedures in case an emergency occurs. For example, Penn State encourages faculty to include the following language in their syllabi:
In the event of a campus closure, course requirements, classes, deadlines and grading schemes are subject to changes that may include alternative delivery methods, alternative methods of interaction with the instructor, class materials, and/or classmates, a revised attendance policy, and a revised semester calendar and/or grading scheme. Information about course changes will be communicated through [e-mail, etc….]
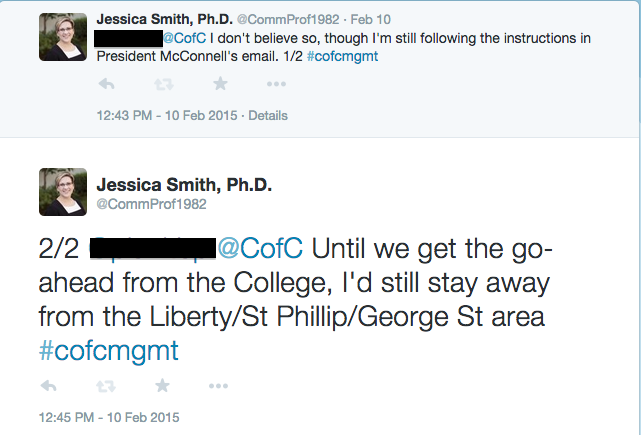
3. Determine communication protocols. If an emergency closes the College or you have to cancel class at the last-minute, how will you communicate with your students? There are numerous options, including email and posting a notification in the OAKS News tool. This semester, I’m using both Twitter and Celly to communicate with students. I don’t know about you, but I’ve found students don’t routinely read their emails, so I decided to meet them where they are and use text messaging and social media.
The numerous ways I use Twitter in the classroom is a blog post for another day, but on Tuesday, I tweeted numerous times to inform students that the Cougar Alert was not a test, that they needed to pay attention to their email, and that class was cancelled. I also used Celly to communicate the same information. Celly provides a way to send SMS text messages without exchanging phone numbers (you can also use the mobile app or website if you don’t text). I’ve found students to be much more responsive to these text messages than email.
For more serious emergencies, when campus is closed for a longer period of time, you may want to communicate with your students synchronously. Skype and Google Hangouts provide simple and free options for hosting virtual, synchronous meetings. The OAKS Discussion tool can also be used for conversation and collaboration.
As my colleague Chris Meshanko says, while we always hope for the best, we must plan for the worst. Anticipating disruptions and making plans can prevent students and faculty from losing valuable contact hours. Most importantly, let students know within the first two weeks of classes what your expectations are if classes are cancelled due to an emergency. And as always, TLT can assist you in choosing the right tools for keeping your class on track.
At college campuses across the country, a new semester has begun, allowing us to once again begin anew. Few professionals have the opportunity to start fresh every couple of months but professors, if they’re so inclined, can modify their classes every semester based upon self and student evaluations. One part of teaching that I have consistently reflected upon is the very first day of classes. How much time should I spend on the syllabus? Are there any icebreakers that aren’t incredibly corny? Should I teach course material that day?
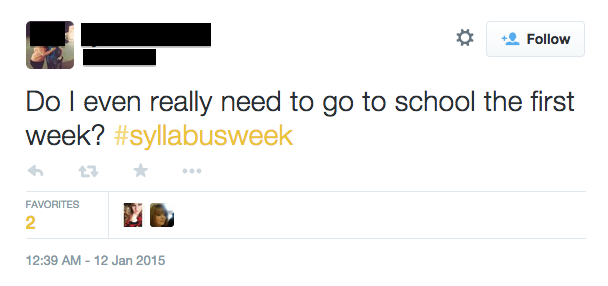
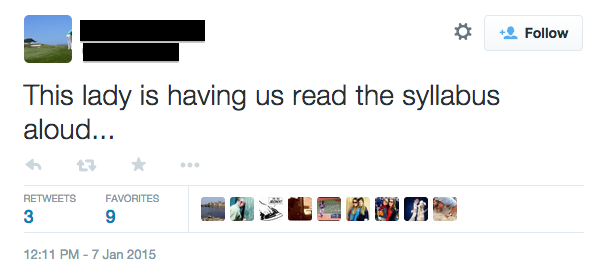
If students’ social media posts are any indication, professors can’t seem to win: if they spend time talking about the syllabus, students complain; if they launch right into course material, students complain. Check out the Twitter hashtag #syllabusweek for a glimpse into the minds of our students.
So what’s a professor to do? Based upon my own experiences and those of many other professors I’ve learned from, here’s my advice:
Don’t make the first day of class “Syllabus Day.” Avoid reading the entire syllabus to students. This is a waste of everyone’s time. Students who care about their learning will read the syllabus on their own. If you’re wary of putting that onus on students, include a syllabus quiz the first week or ask students to sign a syllabus contract. Perhaps more importantly, why not write a syllabus that students might want to read rather than one that looks like a Terms of Service agreement. For tips on making your syllabus more student-friendly, check out “Crafting a Learner-Centered Syllabus.”
Don’t let them go after five minutes. What’s the point of meeting if nothing is going to be accomplished the first day? I used to think students would perceive me as “cool” if I let them go after only a couple minutes. Not so. Most students felt their time was completely wasted. Put yourself in their shoes. If you were asked by a colleague to come to campus for a meeting then, after just a couple minutes, they said “Eh, let’s just continue this conversation later,” you’d likely be frustrated.
Focus the first class on making connections instead of giving directions. Rather than spending 50 minutes telling students what they can and cannot do in your class, spend time getting to know one another. That first day tells students a lot about who you are and what kind of teacher you will be. If you spend it giving them “do’s and don’ts” they won’t learn much about you except you like rules. According to Joe Kreizinger from Northwest Missouri State University, focus the first class on:
connecting students to instructor: put your teaching philosophy into student-friendly language and explain how you approach classroom management and student learning.
connecting students to content: explain why this class matters and how it applies to your students’ current and future lives.
connecting instructor to content: tell students the story of how you discovered your discipline. How did you know it was the field for you?
connecting students to students: icebreakers can be corny, but they are also effective at forcing students to talk to one another rather than stare at their cell phones while they wait for class to begin.
Build icebreakers into the entire first week, even beyond. Most professors include some type of “getting to know you” activity on that first day. But the class roster doesn’t solidify until after the add/drop deadline. Therefore, I suggest icebreakers are even more important during the third and fourth class periods. This doesn’t have to take much time. I typically incorporate self-introductions into roll call, asking students silly questions to make them chuckle. I’m consistently surprised by the number of times students find unexpected connections: “Seamus Finnigan is my favorite Harry Potter character too!!!!” Some students may be grumpy about icebreakers, which is understandable considering they do them in every class, but that encourages me to find new ones each semester.
I hope these tips help you design an engaging and productive first-week routine. Best wishes for an enjoyable semester!