1-1-1, Faculty Technology Institute, iPad, Mobile

Faculty Guest Post: eTextbooks and iPads as teaching tools

Our guest blogger is Vijay Vulava, an associate professor in the Department of Geology and Environmental Geosciences. Dr. Vulava was a participant in the Summer 2013 Faculty Technology Institute.

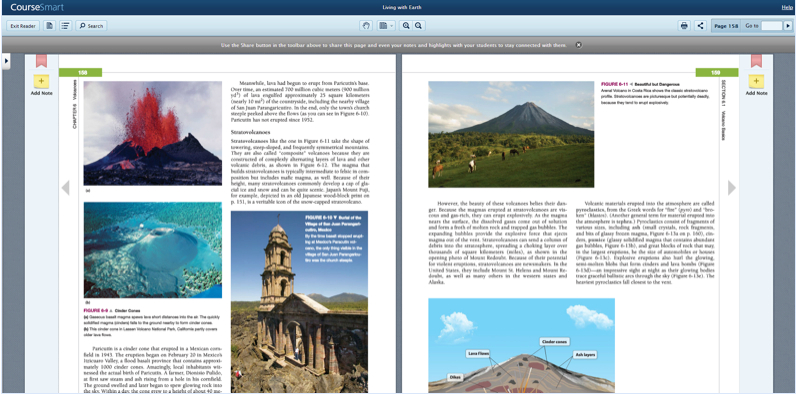
Like any of you at the College, I used to carry a few textbooks on me a lot of times. I had even resorted to keeping a second copy in my home, so I didn’t have to shuttle textbooks with me. One of the great advantages of having a connected device (laptops, tablets, smartphones, etc.) at your disposal is the ability to access digital versions of your textbooks (eTextbooks) anywhere there is internet access. This, of course, depends on whether the textbook publishers make eTextbooks available. A few years ago a publisher’s representative introduced me to CourseSmart (http://www.coursesmart.com/), a consortium of textbook publishers that publish their textbooks online. An exact copy of a textbook I requested was made available in eTextbook format and was accessible on any internet browser within seconds – I just had to login to my account. On this site, all eTextbooks are available for free to any instructor (you have to request access for each textbook), so you get to review a bunch of textbooks before you adopt one for the class. The eTextbooks look identical to hard copies and contain basic note taking, highlighting, sharing, and printing tools. And because the eTextbooks are available on any computer, you could easily take screenshots of selected pages, sections, or pictures to include in your lectures and notes. I found this very convenient in helping my students navigate through textbooks or helping them find information they need. The big downside of this eTextbook platform is that the publishers have not exploited the full potential of eTextbooks. The content in the text is not hyperlinked within the document (e.g., you cannot click on a figure citation to go to the figure), with the publishers’ own teaching resources (often videos, photos, animations, etc. provided in a CD with the textbook), or to any sources online (e.g., videos, government websites, etc.). The publishers could certainly learn a lot about how to make good eTextbooks by looking Al Gore’ 2009 publication, Our Choice and the accompanying app (http://pushpoppress.com/ourchoice/).

iPads have now made accessing eTextbooks more convenient. CourseSmart apps are now available for Android, iOS, or Windows tablets. I now carry these eTextbooks to class, flip to the required section, and show to my students. These eTextbooks are also available offline when there is no internet access available. I often take screenshots of the eTextbook sections right on the iPad (press Power and Home buttons at the same time and find the screenshot in the Camera Roll) and make annotated notes for the class. TLT’s website has tutorials for projecting from an iPad to a digital projector (http://goo.gl/9EXVw).

There are other eTextbook platforms such as Amazon Kindle and Kno that offer alternatives to CourseSmart, but I did not find as large a textbook selection in either of these platforms. Amazon Kindle does offer a large selection of wider interest titles than any other textbook consortium. In addition to the Kindle eReader, the Kindle app is available for all major connected devices as well.

CourseSmart is a good option for students that are digitally adept and those that prefer content from devices rather that physical textbooks. They can rent textbooks for 180 days and the prices are a lot less than what they would pay for a hard copy at a bookstore.

online teaching tips
Best Practices

Online Teaching Tip – Assign Each Student an Accountability Partner

Students are struggling this year to stay on top of content and class work.  Some faculty are having success assigning students to an accountability partnership.  This partner is someone they can go to if they miss class, have questions, or just want to talk about the day’s lecture or assignment.  It’s a way to help students stay on top of what’s due and when as well.

keyThe Key Is Making Them Work

In order to make this work, you, as the instructor, need to want this to work.  That can be done via modeling in your interactions with the class.

  • Talk about the partners when it seems appropriate, to continue to bring the partnership to the forefront.
  • Encourage them to ask their partner before asking you.
  • When doing partner work in the classroom or online, keep your partners together to help them form trust.
  • Have students share their weekly academic goals with their partner to help with accountability and scheduling.

However you do it, encourage the students to use this partnership to their advantage.

lightbulb

 A few tips

  • Conduct FUN ice breaker activities to help the partners get to know one another.  An example may be to do a virtual escape room together.
  • Ask them to schedule regular video calls with each other to go over what’s coming up that week and planning for future assignments.
  • Ask them to set goals at the start of the week and then show how they accomplished them the following week.
This “Buddy” system, if implemented and encouraged, can be a great resource and support system for your students and will hopefully increase community in your classroom and give the students the relationships and connection they are craving.


TLT

Flashcards? Yes!

Here are two flashcard creation tools as well as information supporting the use of flashcards and their effectiveness.

Recommendation 1: Quizlet

Quizlet offers both free and paid version of its web-based tools and is also available on the App Store and Google Play.

To learn more about this tool go to https://quizlet.com/

And also check out Quizlet Live a free in-class game where students work in teams to learn study sets on Quizlet.  Teams work together to correctly match the terms and definitions in a study set.

Recommendation 2: Brainscape


Brainscape also has free and paid versions. To learn more about this tool go to https://www.brainscape.com/

And here is what Brainscape has to say about flashcards:

Why Flashcards Help Us Learn

1. Flashcards engage “active recall”

When you look at the front side of a flashcard and think of the answer, you are engaging a mental faculty known as active recall. In other words, you are attempting to remember the concept from scratch rather than simply staring at the passage in your textbook or recognizing it on a multiple choice quiz. Active recall has been proven to create stronger neuron connections for that memory trace. And because flashcards can so easily facilitate repetition, they are the best way to create multiple memory-enhancing recall events.

2. Flashcards utilize your metacognitive faculties

When you reveal the answer side of a flashcard to assess your correctness, you are essentially asking yourself “How did my answer compare to this correct answer?” and “How well did I know (or not know) it?” This act of self-reflection is known as metacognition. Research shows that applying metacognition tends to ingrain memories deeper into your knowledge.

3. Flashcards allow for confidence-based repetition

Because flashcards exist loosely, rather than tied to a book or document, you are able to separate them into piles based on whether (or how often) you need to study them again. This practice of confidence-based repetition is proven by decades of research to be the most scientifically optimized way to improve memory performance.

Of course, where possible, you should always try to learn new concepts using project-based learning, or by asking your own questions. But when it comes to studying or reviewing concepts in the most effective way possible, nothing comes close to flashcards. Especially adaptive learning flashcards.

Taken from Cohen, A. (July 25, 2017) The Top 3 Reasons Why Flashcards Are So Effective. Retrieved from https://www.brainscape.com/blog/2011/04/reasons-why-flashcards-are-so-effective/


TLT

Chrome Extensions Part 2 – Tools for Productivity

I am always looking for ways to be more productive and that search has led me to Chrome Extensions.  These are applications that run inside your Chrome browser and enhance the functionality of that browser.  Back in July 2015,  I shared a list of Chrome Extensions that I use and now I would like to add to that list!

  1. Save to Google Drive   The Save to Google Drive Chrome extension helps you save web content or browser screenshots to your Google Drive.
  2. You can shorten a URL with just one click from your Chrome browser with goo.gl URL Shortener    
  3. Read Google Docs and web pages aloud with Read&Write for Google Chrome.  A great tool for multitasking and double checking your grammar. It’s like having a digital proof-reader (or story reader) built right into your Chrome browser.
  4. Awesome Screenshot  for capturing screenshots.  This easy-to-use extension provides great annotation features including text, lines, shapes, highlights, and more.  The clean interface makes creating tutorials and visual aids a breeze with a myriad of screen capturing options including defined selections, delayed capture, and desktop capture.  Save your screenshots directly to Drive, download, or add to your free Awesome Screenshot project library.M
  5. Manage all of your Chrome extensions  with Extensity.  You can quickly access your Chrome extension settings, organize your extensions by category, and disable or enable extensions with one click

Visit Chrome Web Store Help for instructions on how to install and manage extensions.

Best Practices, Pedagogy, Small Teaching Tip, Teaching Advice

Small Teaching Tip #10: Creating Connections

One of the most challenging aspects of education is getting our students to use prior knowledge and to connect that with the new information we are trying to teach them.  It seems as if students walk into each class and compartmentalize it in their brain, often, it feels as if they do this for each unit within a single class.  So how can we have them see the bigger picture?  How can we get them to view their education as a living, changing whole instead of a segmented path?  James M. Lang (2016) offers some tips and strategies to bring in prior knowledge before building upon it.

  • Have the students take a short quiz prior to class asking them to pull from prior knowledge, use the first few minutes of class to go over the results.
  • In the beginning of class tell the students what the lesson is about and have them write down everything they know about the topic, take the next 5 minutes to solicit responses.  
  • At the start of the semester pretest or use group activities to assess prior knowledge
  • After the first class of the semester have the students write down three things the know about the subject matter and three things they would like to learn, discuss these during the second class.
  • Have the students create a minute thesis connecting different themes throughout your course.  You can have them do this in a few minutes or over a whole class period.  Have them share their ideas and discuss it as a class.
  • Create concept maps linking together ideas throughout the course.  Have the students share and explore their peer’s ideas.  They can add to these maps for the whole semester or make new ones depending on the topic at hand.

Remember, as experts in your field it is easy for you to draw connections and see the big picture but for your students it may take more time and coaching.  Make sure to provide the framework for these connections and refer back to them often.  Again, James M. Lang (2016) offers “Quick Tips” on helping your students to connect concepts.

  • Ask students about their prior knowledge at the beginning of the course with oral questions or a “class knowledge dump”
  • Give students the scaffolding or framework of your lecture ahead of class time and let them fill it in using their prior knowledge.
  • Offer examples from everyday life and allow students to offer their own.  Help them to connect the “real world” with class concepts.

In order for us to really educate our students we need to help them see the bigger picture, help them create connections and guide them along the path of a whole, connected, educational career.


This post is part of a series which presents low risk, high reward teaching ideas, inspired by James Lang’s book Small Teaching: Everyday Lessons from the Science of Learning.

Assessment, Best Practices, Collaboration, Distance Ed, Events, Innovative Instruction, Pedagogy, Teaching Advice

DE 2.0 Workshop: Humanizing Your Online Course

humanize-your-content-900x423
“I miss getting to really know my students. It’s just not the same.”

“There’s no way of knowing who is on the other side of the screen.”

Sound familiar? If so then you aren’t alone.

Not only do some instructors feel this way about online learning, but students do as well. Often they feel isolated, disconnected, and insignificant. These feelings of seclusion can often lead to decreased motivation, attention, and engagement. As part of the online learning process, it is vital to intentionally design elements to make sure that that the human connection isn’t lost in the online learning process.


What is Humanizing?

Humanizing your course involves considering the teaching presence, social presence, and cognitive presence of all participants in order to build community and enhance communication. The ultimate goal of this process is to make online education as personal and individualized as possible while building relationships between your students, the content, and yourself.

About the DE 2.0 Workshop

This 3-week long, self-paced session will take you through some strategies that you can use in your online class to make you and your students feel more connected. While this course is held fully online, it does contain three optional synchronous sessions with experts in humanizing online education from around the world!

You might be interested in this session if:

  • You feel you are not connecting with your students in your online class the way you do in your face-to-face class.
  • You feel like your online class lacks community.
  • You want to make your course more engaging and personal for the students.


humanizing-youronline-course

Workshop Goals

  • Discover the elements of teaching presence, social presence, and cognitive presence as it applies to the online learning environment, particularly in the areas of facilitation, learning domains, and course design.
  • Research assessment and engagement strategies, community building/maintaining platforms, and technology tools for increasing the humanized element.
  • Discuss elements of humanized learning with other faculty teaching online at College of Charleston.
  • Ask questions, exchange ideas, and meet other CofC faculty teaching distance education courses.
  • Create engaging content and online activities that foster the elements of teaching presence, social presence and cognitive presence.

Learning Outcomes

  • Explore instructional theories that lead to a more humanized online class.
  • Identify areas of your course that can be made learner centered and/or interactive.
  • Revise and/or create course interactions, including social learning experiences, content delivery methods, and assessment of student learning.

Register now on TLT’s DE Readiness Blog!

Applications are open until January 31, 2017!


Small Teaching Tip: get to class early and engage your students right away. Consider posting a class outline, a thought-provoking image, or play some music.
Small Teaching Tip, Teaching Advice

Small Teaching Tip #2: The Minutes Before Class Begins

Many of us arrive to our classrooms without time to spare.  We then concentrate on taking attendance, turning on the computer and projector, or reviewing our lecture notes. Meanwhile, our students sit silently, gazing at their phones.  We may not consider the minutes before class begins as consequential, but they offer a fertile opportunity to get to know your students better and build a more positive classroom environment.  So make it a goal to arrive to your classroom early and use those extra few minutes to chat with your students and set the stage for the rest of the class period.  Here are a few ideas:

Display a class agenda or outline.  This is a simple way to help students see how the class period will be organized and understand how the information they learn today relates to what they learned last week.  As an expert in your field, you have a clear understanding of the framework of your discipline and how concepts are interconnected.  But novice learners tend to see facts, concepts, and skills as discrete pieces of knowledge, without much awareness of the connections that join them.  Thus, a simple outline can help students to better organize information in their memories.

Display a thought-provoking image.  Encourage your students to start thinking about the class content, rather than staring at their phones, by displaying something that will pique their curiosity such as a political cartoon, quote, or video clip.  For example, Peter Newbury posts NASA’s “pic of the day” for his students to look at as they file into the classroom.  On each image, he types two questions:  “What do you notice? What do you wonder?”  This simple visual prompt serves multiple purposes: it grabs his students’ attention, serves as a conversation-starter, and provides an opportunity to discuss how the images connect to previous course material.

Play some music.  Playing music is a great way to “warm up” the room and create a less stuffy environment.  Music can be used strategically to establish a particular atmosphere, such as energizing your lethargic students or calming them before an exam.  Steve Volk creates playlists themed for each class and encourages students to bring their own music.  He then shares the playlists with his students at the end of the semester.  This strategy is not relevant only to those who teach in the arts.  Think creatively about how music might relate to your course content, such as playing protest songs, Renaissance madrigals, or Native Andean flute music.

If these ideas aren’t appealing, I challenge you to identify a strategy that works with your teaching style and course content.  Both instructors and students need a little transition time at the beginning of class to get mentally prepared to learn and engage.  So don’t waste those precious few minutes!


This post is part of a series which will present low risk, high reward teaching ideas.  Inspired by James Lang’s book Small Teaching: Everyday Lessons from the Science of Learning, this series will inspire you to implement small but powerful changes to your teaching.

To read Tip #1 about encouraging student voice, click on this link: tlt.cofc.edu/2016/08/09/small-teaching-tips


instructional technology, Productivity, Teaching Advice, Tech Generation, TLT

Start your semester off right!

Starting a new semester can be daunting but let us help you with our Start of Semester Checklist!  This checklist gives you a list view of important tasks to complete to make sure your semester starts off smoothly, it also tells you how to complete most tasks.  Some of the tasks and include: Verifying your course shell has been created, confirming your course start date, enrolling non-students into your course, cross listing, and building course content and student enrollment.  Let us make it easier for you, click on our checklist!


Start of Semester Checklist 


Google Sheets my fav. 5 tips and tricks
Google, Google Apps, Productivity, Research, TLT

Give Sheets A Chance

I am a huge fan of Microsoft Excel.  It’s my second favorite application, after Photoshop.  However, I’ve been attempting to move all of my work to Google Apps for Education and I felt like Google Sheets was just not as robust a program as Excel.  That being said, I’ve been working with Sheets exclusively for several months now and am finding many things that are making me love it.  Not as much as Excel, but close.

Here are my top 5 coolest things I’ve learned over the past months:

EXPLORE

screenshot of the explore area openNext time you open up a spreadsheet in Google Sheets, notice the little icon in the lower right cornerExplore icon.  If you click it you get a flyout panel called Explore.  This panel gives you a fantastic overview of your data in chart form and allows you to easily add the charts to your document with one simple click.  I loved this and I don’t believe there is an equivalent in Excel.

How can you use this?

If you create a form, in Google Forms, your data will be collected in a Google Sheet.  The charts in Explore give you the overview you need to get started on your data analysis

You can upload any Excel spreadsheet into Google Sheets and it will convert it to Sheets format so you can get this overview on data NOT collected in Google Drive.

PIVOT TABLES

A pivot table is a tool that allows you to summarize and explore data interactively and is particularly useful for large data sets.   I use them primarily to count or average things but they can be used to extract all types of date from sets.   Google Sheets now allows you to easily create these pivot tables.  Here’s an example of a quick table created from the data we looked at above.  This is a simple pivot table but they can be more complicated depending upon your needs.  Just like in Excel, they update in real time, as the data in the Sheet changes.  You can find pivot tables under Data > Pivot Table

screenshot of the pivot tableScreenshot of a more complicated pivot table

ADD AND DELETE CELLS INSTEAD OF ONLY ROWS OR COLUMNS

There are many times that I want to delete or add a few cells in a spreadsheet and have the rest of the spreadsheet shift to accommodate those cells.  In Sheets you can only add or delete and entire row or column which isn’t very helpful.  With the help of an Add-On called Insert and Delete Cells by Karl.kranich.org you now can.  In Sheets go to Add-ons in the menu bar then choose Get add-ons  In the search area, type in Insert and Delete Cells.  Click on Free.  A pop up window will appear so make sure pop-ups are not blocked.  From that window click Allow. 

Screenshot of the menu To add or delete cell(s) just click on the appropriate cell(s) and choose Add-on again.  You will see it in the menu a new option to allow you to shift the cell after adding or deleting. 

How can you use this?

I use this feature all the time.  Here’s an example:  I paste or import data into a spreadsheet and for some reason, one line is offset just one cell.  This happens if there is a wayward space in the paste.  Now I can just select that cell and shift the rest of the columns one cell to the left to line all the data back up.

FINDING UNIQUE AND DUPLICATES

As much as I love Excel I still struggle with filtering duplicates from a dataset.  This is also something that I use all the time.  For instance, for our training stats, I like to see all the individuals that attended TLT training in one year.  For this report, I only want each individual counted once.  For this I use an add-on called Remove Duplicates by ablebits.com.  Just like earlier you can get it from the Add-ons > Get add-ons menu and search for Remove Duplicates.  Once it’s installed you just select the data then choose Remove Duplicates from the Add-ons menu and follow the instructions.  It’s just four easy steps to locating all the unique or duplicate entries in your data and I think it’s 10x easier than the filter feature in Excel.

PREVENT PRINTING, COPYING, AND DOWNLOADING

Screenshot of Advanced SharingDid you know that you can share a spreadsheet with people without giving them the ability to print it, copy it, or download it?  Well you can.  Just open your Sheet and click on the Share button in the upper right corner.  Now click on Advance in the bottom right of the new window.  Make sure your normal settings are set correctly depending upon the level of security you want.  Then at the bottom click on Disable options to download, print, and copy for commenters and viewers.  This actually works surprisingly well, especially with a large spreadsheet.  Could some take a screenshot of the data?  Sure, but the only way to stop that is to not let them see it in the first place.  

How can you use this?

This came to my attention when a faculty member wanted to share a large list of internship options but didn’t want that list to be shared with those outside her class.  Again, while not foolproof, it provides enough of a deterrent to meet the needs.

REMEMBER:  DO NOT STORE ANY STUDENT SENSITIVE INFORMATION ON GOOGLE DRIVE/SHEETS.

I hope these tips will get you to reconsider Google Sheets as a viable alternative to Excel.

Best Practices, Pedagogy

Energize In-Class Discussions

Last week, I was commiserating with an instructor about her struggle to engage students in discussion during class.  “Sometimes it’s like talking to a brick wall,” she lamented.  Facilitating lively conversations that require students to apply, synthesize, and evaluate their knowledge is one of the most challenging aspects of teaching.  Even the most brilliant lecturer can be stymied by an unresponsive class.  So these are my top tips for improving class discussions:

Plan your discussion prompts in advance.  Thought-provoking questions are challenging to come up with on the fly.  So when planning your lectures and in-class activities, craft prompts as well.  Without prior contemplation, we may resort to asking “any thoughts about that?” and be discouraged by the blank stares we receive.

Use hooks to launch the discussion.  Rather than starting a discussion with a single question, consider building up to that prompt with a hook to pique your students’ interest and start their thinking process.  For example, present a short case study, tell a story, recite a witty quote, show a video clip, or share a current event.  These serve as points of departure that contextualize your questions and give students the opportunity to apply their knowledge.

Ask better questions.  Often because we haven’t given them much thought in advance, our discussion prompts fall flat.  Our questions are too vague, too long-winded, or limited to yes-no answers.  Instead, make sure your questions are succinct, clear, and open-ended.  This may seem obvious, but I often ramble a bit when asking questions forcing students to inquire, “so what’s the question again?”  Some ideas for discussion prompts

  • Ask for students’ input: What should ___ have done? What would you do in this case?  Have you had a similar experience in your life?
  • Ask “how” and “why” questions: How might this argument be made more persuasive? Why do you think the author made this argument?  How does ___ compare to ____?
  • Ask evaluative questions: How compelling is the author’s argument?  What are the implications of ____?
  • Ask prediction questions: What will occur next?  What might happen if. . .?
  • Ask justification questions: What evidence led you to conclude that…? What is the reason…?

Give your students a chance to think.  Many of us are uncomfortable with silence, so when students don’t immediately respond to our questions, we continue talking.  It’s easy to forget that students are disciplinary novices who need greater time to ponder than we do.  So when asking a question, pause for a good 30 seconds before probing further.  Don’t surrender and answer the question for your students.  Force yourself to endure the silence.   

Think-pair-share.  Many faculty turn their noses up at strategies implemented in K-12 classrooms, but that’s where a majority of innovative pedagogy comes from.  Think-pair-share is a simple but brilliant way to encourage conversation. First, after presenting your hook and prompt, let students jot down their ideas on scrap pieces of paper.  Then, ask them to turn to their neighbors and share their ideas.  Finally, bring the entire class together and have the pairs report what they discussed.  This gives students the chance to think and talk through their ideas before being put “on the spot” in front of the entire group.

Use positive reinforcement.  When students contribute to class discussion in ways that demonstrate higher-order thinking, acknowledge it.  Saying, “that’s a great question” or “good point” is an effective start, but be more specific with your feedback.  For example, “Sam makes an excellent point. I appreciate how you supported your claim with evidence from the reading.”  This demonstrates to students what a “good” response sounds like, providing a model they can all use.

Ask follow-up questions. When students respond with brief or incomplete answers, don’t miss the opportunity to ask a follow-up question such as, “Could you tell me more?” or “Why do you say that?” or “How did you come to that conclusion?”  You can also pull in other students to contribute: “Let’s help Jamie out, why might we reach the conclusion that. . .?”

End discussions purposefully.  Before moving on to the next lecture topic or question, summarize what was discussed or ask a student to do so.  This helps students to synthesize new information and integrate it with existing knowledge.  You could also consider ending your class with some type of “exit ticket” such as a minute paper or Poll Everywhere poll (which is a free tool for CofC students and faculty).  Exit tickets are a quick and easy method to help students solidify their understanding as well as communicate to the instructor what they still have questions about.

Do you have other suggestions for facilitating engaging class discussions?  Please share!

For help improving discussions in your online course, check out this post written by my colleague, Mendi: http://blogs.cofc.edu/tlt/2015/10/28/tips-for-more-effective-online-discussions/