Our guest blogger is Vijay Vulava, an associate professor in the Department of Geology and Environmental Geosciences. Dr. Vulava was a participant in the Summer 2013 Faculty Technology Institute.
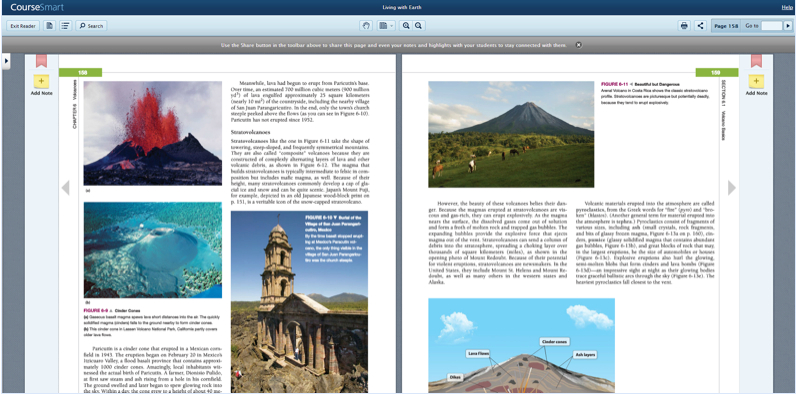
Like any of you at the College, I used to carry a few textbooks on me a lot of times. I had even resorted to keeping a second copy in my home, so I didn’t have to shuttle textbooks with me. One of the great advantages of having a connected device (laptops, tablets, smartphones, etc.) at your disposal is the ability to access digital versions of your textbooks (eTextbooks) anywhere there is internet access. This, of course, depends on whether the textbook publishers make eTextbooks available. A few years ago a publisher’s representative introduced me to CourseSmart (http://www.coursesmart.com/), a consortium of textbook publishers that publish their textbooks online. An exact copy of a textbook I requested was made available in eTextbook format and was accessible on any internet browser within seconds – I just had to login to my account. On this site, all eTextbooks are available for free to any instructor (you have to request access for each textbook), so you get to review a bunch of textbooks before you adopt one for the class. The eTextbooks look identical to hard copies and contain basic note taking, highlighting, sharing, and printing tools. And because the eTextbooks are available on any computer, you could easily take screenshots of selected pages, sections, or pictures to include in your lectures and notes. I found this very convenient in helping my students navigate through textbooks or helping them find information they need. The big downside of this eTextbook platform is that the publishers have not exploited the full potential of eTextbooks. The content in the text is not hyperlinked within the document (e.g., you cannot click on a figure citation to go to the figure), with the publishers’ own teaching resources (often videos, photos, animations, etc. provided in a CD with the textbook), or to any sources online (e.g., videos, government websites, etc.). The publishers could certainly learn a lot about how to make good eTextbooks by looking Al Gore’ 2009 publication, Our Choice and the accompanying app (http://pushpoppress.com/ourchoice/).
iPads have now made accessing eTextbooks more convenient. CourseSmart apps are now available for Android, iOS, or Windows tablets. I now carry these eTextbooks to class, flip to the required section, and show to my students. These eTextbooks are also available offline when there is no internet access available. I often take screenshots of the eTextbook sections right on the iPad (press Power and Home buttons at the same time and find the screenshot in the Camera Roll) and make annotated notes for the class. TLT’s website has tutorials for projecting from an iPad to a digital projector (http://goo.gl/9EXVw).
There are other eTextbook platforms such as Amazon Kindle and Kno that offer alternatives to CourseSmart, but I did not find as large a textbook selection in either of these platforms. Amazon Kindle does offer a large selection of wider interest titles than any other textbook consortium. In addition to the Kindle eReader, the Kindle app is available for all major connected devices as well.
CourseSmart is a good option for students that are digitally adept and those that prefer content from devices rather that physical textbooks. They can rent textbooks for 180 days and the prices are a lot less than what they would pay for a hard copy at a bookstore.
Today’s Faculty Guest Post is from Glen Riecken, Visiting Professor of Marketing. Glen attended TLT’s 2015 Faculty Technology Institute. In this post, he reflects on the process of incorporating VoiceThread into his MKTG 302 (Marketing Concepts) courses.
I am writing this blog post based on my experience incorporating VoiceThread into my MKTG 302 classes over the past two semesters. My use of VoiceThread resulted from a confluence of three events: attendance at TLT’s 2015 Faculty Technology Institute where I was first exposed to VoiceThread, preparation to initially teach a hybrid express course at the North campus in Fall 2015, and a nagging desire to create a flipped classroom experience in my live classes. The hybrid course required more online so I needed a way to deliver content in that medium. Having read more and more about the idea of a flipped classroom, I began to see its advantages, especially in generating greater student class engagement in all my classes. When I was exposed to VoiceThread at the TLT FTI, it struck me as an ideal tool to assist in accomplishing my goals.
Here I will briefly discuss VoiceThread, how I use it and some pros and cons from my perspective.
VoiceThread (VT)
VT is a content delivery and blogging tool, allowing people to communicate through both visual and audio modes in a dynamic and asynchronous fashion. This makes it ideal for creating an interactive environment naturally capturing today’s student immersion in instantaneous interpersonal communication tools. After posting an initial message, others are invited to comment on it. They may answer questions, ask questions or post comments in text, voice, images or video formats.
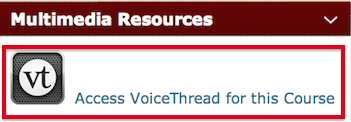
Access VT through the OAKS homepage.
College of Charleston faculty and students receive free accounts with full accessibility to VT’s many features. It is easy to learn and use. Tutorials are available through TLT, VT and YouTube.
VT is cloud based so works in almost every environment as long as one has access and a device (including mobile) that has Adobe flash. Course homepages have a VT link established and a single click will navigate to VT content for that course. It is fully integrated into OAKS. In the content module in OAKS, I have an outline for each section of the course and, as part of the outline, also provide a direct link to each chapter’s VT. I know it’s redundant, but students will be students.
Creating VT Lectures
I use PowerPoint® (PPT) in my class lectures and had already built a set of slides for each chapter in the text. The first task was to import a slide show into VT. I learned immediately that VT and PPT do not like each other. The secret I learned (thanks to Jessica Smith) was to first save the PPT in pdf format. Once that was done, I assumed the imported file was ready to go. However, another impediment for me was that animations are lost. I use animations to bring in various slide elements sequentially as I discuss them in class; students are more likely to pay attention rather than trying to read an entire slide when I am still talking about the first bullet point. There is, as far as I know, no way around that with VT and this, to me, is a drawback to VT. Similarly, my occasional odd sound effects in some of my slides do not transfer.
VT is more accommodating with Word® but I have noticed that sometimes the formatting is changed a bit. The editing features of VT do not seem to allow an easy fix. After some trial and error, I found that making changes in the Word document itself and then uploading again will often, but not always, produce the format I wanted but this seems like an excessive waste of time. Now, for the few Word documents I use, I don’t worry with the format differences.
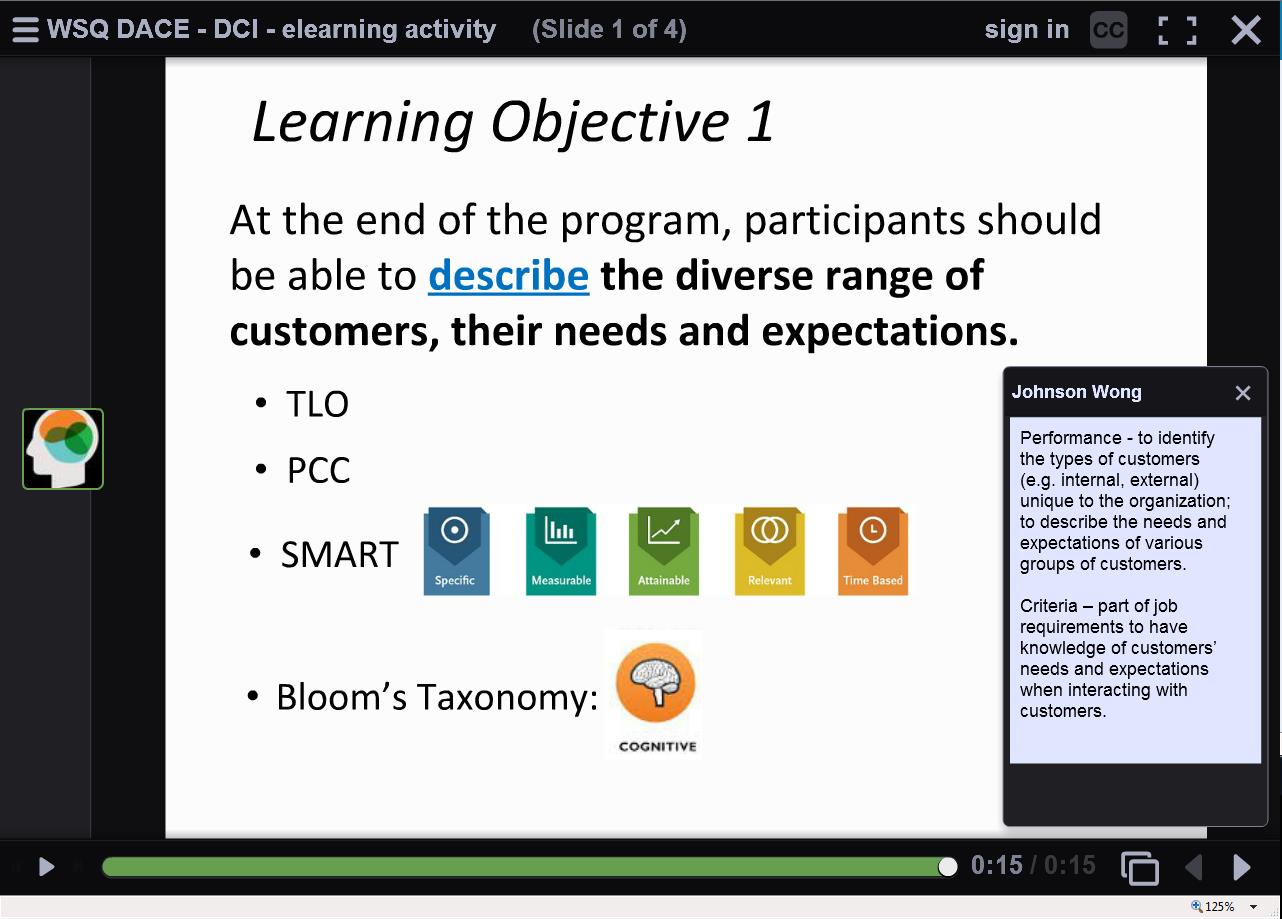
An example VT slide with text comment.
Initially I began recording using the built in camera and microphone on my desktop but soon found the quality of sound was not great and I didn’t like having me show in a little box on the screen, visible to all. An option in VT is to not have the visual box of you show so that part was easily solved. A venture to an electronics store and $30 produced a nifty headset with dropdown mic (mine is a Logitech®) that works great. Incidentally, I chose a corded set since several reviews I read beforehand suggested that cordless sets don’t have the same sound quality. Now I was set to go! By the way, in my last set of instructor evaluations, one student commented that I have a “radio voice” (which I guess is a good thing and goes along with my face which is also ideally suited for radio).
A recording session involves opening slides one at a time and talking about the key points you wish to make. If desired, audio and visual clips may be added (say a YouTube video) as can annotations. For example, in a self-introduction VT, I superimposed a set of dotted lines on a map to illustrate my moves from living in the frozen Canadian prairie to the warm climate of Charleston.
After recording each slide the sound may be reviewed. A drawback, though, is that if a particular piece of sound needs revamping, the whole slide must be re-recorded. Otherwise, the slide may be edited in various ways. Additional slides may be inserted at any time. For example, a good practice is to have a break about every 15 minutes or so. So, after recording a slide show, I can see how long the entire thing is (I shoot for for about 30 minutes) as well as each slide. After adding the length of slides until about 15 minutes and determining a natural break point as close to that as possible, I then insert a “Break in the Action” slide. In these slides I suggest the students relax for a moment to have a bathroom break or have a beverage or take the pooch for a stroll or (not being a cat person) to put the cat outside and lock the door.
VT has a number of options that allow for customization. One pertains to slide advancement. By default, slides are set to advance automatically every 4 seconds but that is easily changed to any desired length or the automatic advance may be turned off which is what I do. Student feedback indicates this is a desired feature, allowing students to go through the slides at their own pace and replay a slide if they wish. They also may stop the presentation at any point and pick it back up later.
Although I have a standard title page in my PPT lectures, another VT option is to add cover art so that each chapter could begin with a picture, for instance, that would match the content. The cover may also be other types of files. So far I have resisted temptation to put links to cat videos as covers for the “Break in the Action” slides. Since I teach marketing I could make a chapter about pricing have a cover slide with various monetary symbols.
Another feature worth noting is that the audience for the VT creation can be made public (open to anyone with a VT account) or restricted to a particular audience. I ensure that my lectures are shared with my classes but are not generally publically available. I don’t need any more hate mail from cat lovers.
Using VT
Students are asked to listen to the VT lectures prior to class discussion. Requiring this makes the acquisition of much of the content up to them, providing more class time for discussions and exercises and moving me towards more of a flipped classroom. Students are not passive listeners to the lectures (other than when they undoubtedly nod off). One feature of VT allows them to “doodle” by making temporary marks on the slides; they might, for instance, circle something to highlight it. These doodles last only a short time so the slides are not inundated with multiple doodles.
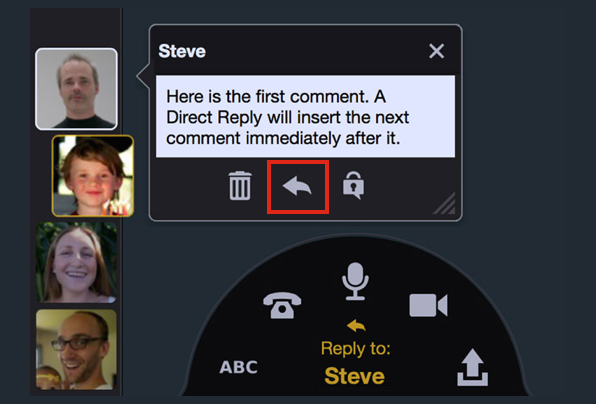
Example comment on a VT that others can respond to.
During the lectures I often ask questions, encouraging students to respond. This interactive feature is probably one of the biggest advantages of using VT. Students may respond directly in a number of ways. The responses I have received so far have been text but VT has several other options including microphone, webcam, phone, and audio-file upload. I seem to get a lot more written comments than I do verbal ones in a live class setting. Comments may also be directed at other students’ comments so that an interactive environment is created. Although I have not used this feature, it is possible to require that comments be moderated first so that any inappropriate ones may be filtered out. So far there has been no issue so I continue to labor under the assumption that college students are sufficiently mature to know not to make offensive comments in such a forum.
A second big advantage of VT is that the interactive element allows students to collaborate on projects. In my MKTG 302 classes I do some group activity but so far have not required students to use VT in this regard although I plan to start in the Fall 2016 semester. I have been using the OAKS “Group” feature but now think that VT will be an easier forum for both students and me. For example, one assignment I use now and then is to have groups of 5 -6 students discuss a topic such as whether the attitudes of men and women towards shopping is changing. In VT it will be easier to quickly see comments and participation rather than the more convoluted method in OAKS.
One last feature that I would like to use in VT is integration with the grade part of OAKS. VT is capable of making the integration but I do not know if CofC allows grades to be imported from VT. I use a publisher website for a number of assignments in the class and until very recently CofC would not permit the grade integration feature to work. If it is permissible, I will start using the grade integration feature this fall. [Note from TLT: this is a new feature in VoiceThread that we are currently exploring. If we are able to offer this feature, we will inform the campus community]
Student Feedback
Student feedback from using VT has been very positive. Students like the flexibility of choosing when to listen to the lectures. They also like their availability for study purposes. Some report liking the ability to listen at their own pace and being able to go back and listen to chosen slides again if needed. A few students indicate they like the comment feature where then can post comments rather than verbalizing them in class. And some, inexplicably, enjoy my cat comments.
Are you interested in learning about web building tools?
Do you want to learn how to create a custom website for your course?
If so, you’re going to LOVE this session!
Casting Your Web: Building a custom website for your course (for free!)
Presenter: Paul Collins
Session Date: March 9th
Session Time: 1:30- 3:00 pm
Sitting down to build a website can seem an intimidating and daunting proposal. But, as technology advances make it easier and easier (not to mention cheaper) to have a web presence, it is worth exploring some of the tools that have become available to use in our classes. A number of pretty good tools have made it possible to build websites to help to support our teaching. Weebly and Wix are two of these. I have used both services to support both my classes and my professional practice. I will briefly present the websites that I have created, and discuss how each has been useful to my work both within the College and outside of it. I will then go ‘under the hood’ to show the customization tools at work.
In the second part of the workshop, participants will explore the interface of each of these services, and experiment with some of the tools that are available to the user. I will then give a tutorial in which participants will be able to build webpages that can be published on the web by the end of the session!
In order to ‘play along’ in the web-building part of the workshop, participants will need a laptop (as opposed to a mobile device), as the editing engines do not yet work on mobile platforms. The demonstration portion of the workshop will work equally well on laptop and mobile.
TLT invites you to submit a proposal to present at The Teaching, Learning, and Technology Conference, the next generation of the FTI. This event is designed to bring together expertise from across campus, spotlight teaching excellence, and provide a space for idea sharing and networking. This TLT Conference will showcase the amazing teaching and learning that is happening on our campus, and we need you, the College of Charleston faculty, to help make it a success!
This new version of the FTI will have a conference style format with keynote speaker and faculty presenters throughout the 3 day event during Spring Break (March 8, 9, and 10).
Details about the conference are included below. The proposals are due November 5. Proposals may focus on anything you think other faculty would benefit from hearing about as we will have a wide variety of sessions on innovative and engaging approaches to teaching and learning.
If you would like to participate or propose an idea, but are unsure about filling an entire session, let us know and we will work with you to find a partner or a relevant panel discussion group.
If you are unable to present, we still hope that you will be able to attend! More information about the sessions and registration will be sent out in November.
What:
The Teaching, Learning, and Technology Conference is the next generation of the Faculty Technology Institute (FTI). Over the past fifteen years, the FTI has evolved into one of the most successful faculty development programs on campus. The Teaching, Learning, and Technology Conference will allow TLT to continue offering outstanding faculty development but to a broader audience. TLT is excited to provide this opportunity for greater campus discussion and collaboration about pedagogy and instructional technologies.
The new FTI will be delivered in a conference style format where participants will be able to choose sessions that are the most attractive and relevant to their own professional development. Session types will include panel presentations, spotlight sessions, working groups, and a keynote address. During and in-between sessions there will also be spaces where participants can continue the conversation with colleagues and reflect on their own teaching practices.
When and Where:
The Teaching, Learning, and Technology Conference will be held March 8, 9, and 10 2016 at the College of Charleston.
Proposal Form:
https://goo.gl/3vnHUl
More than one proposal from the same individual may be accepted based upon space availability.
As you prepare your proposal to present, please check all information for accuracy, completeness, spelling, and grammar. Information associated with accepted applications will be used for conference app and web content. If this falls outside of your past FTI 1-1-1 or PLC commitment you may be eligible for an honorarium.
Submission Deadline:
November 5, 2015
Submission notification:
On November 23, 2015 you will be notified about the status of your proposal.
Selection Process:
All applications to present will be selected by TLT based on the following criteria:
Interest to multidisciplinary conference attendees
Content of presentation
Quality of presentation
Completeness and accuracy of application
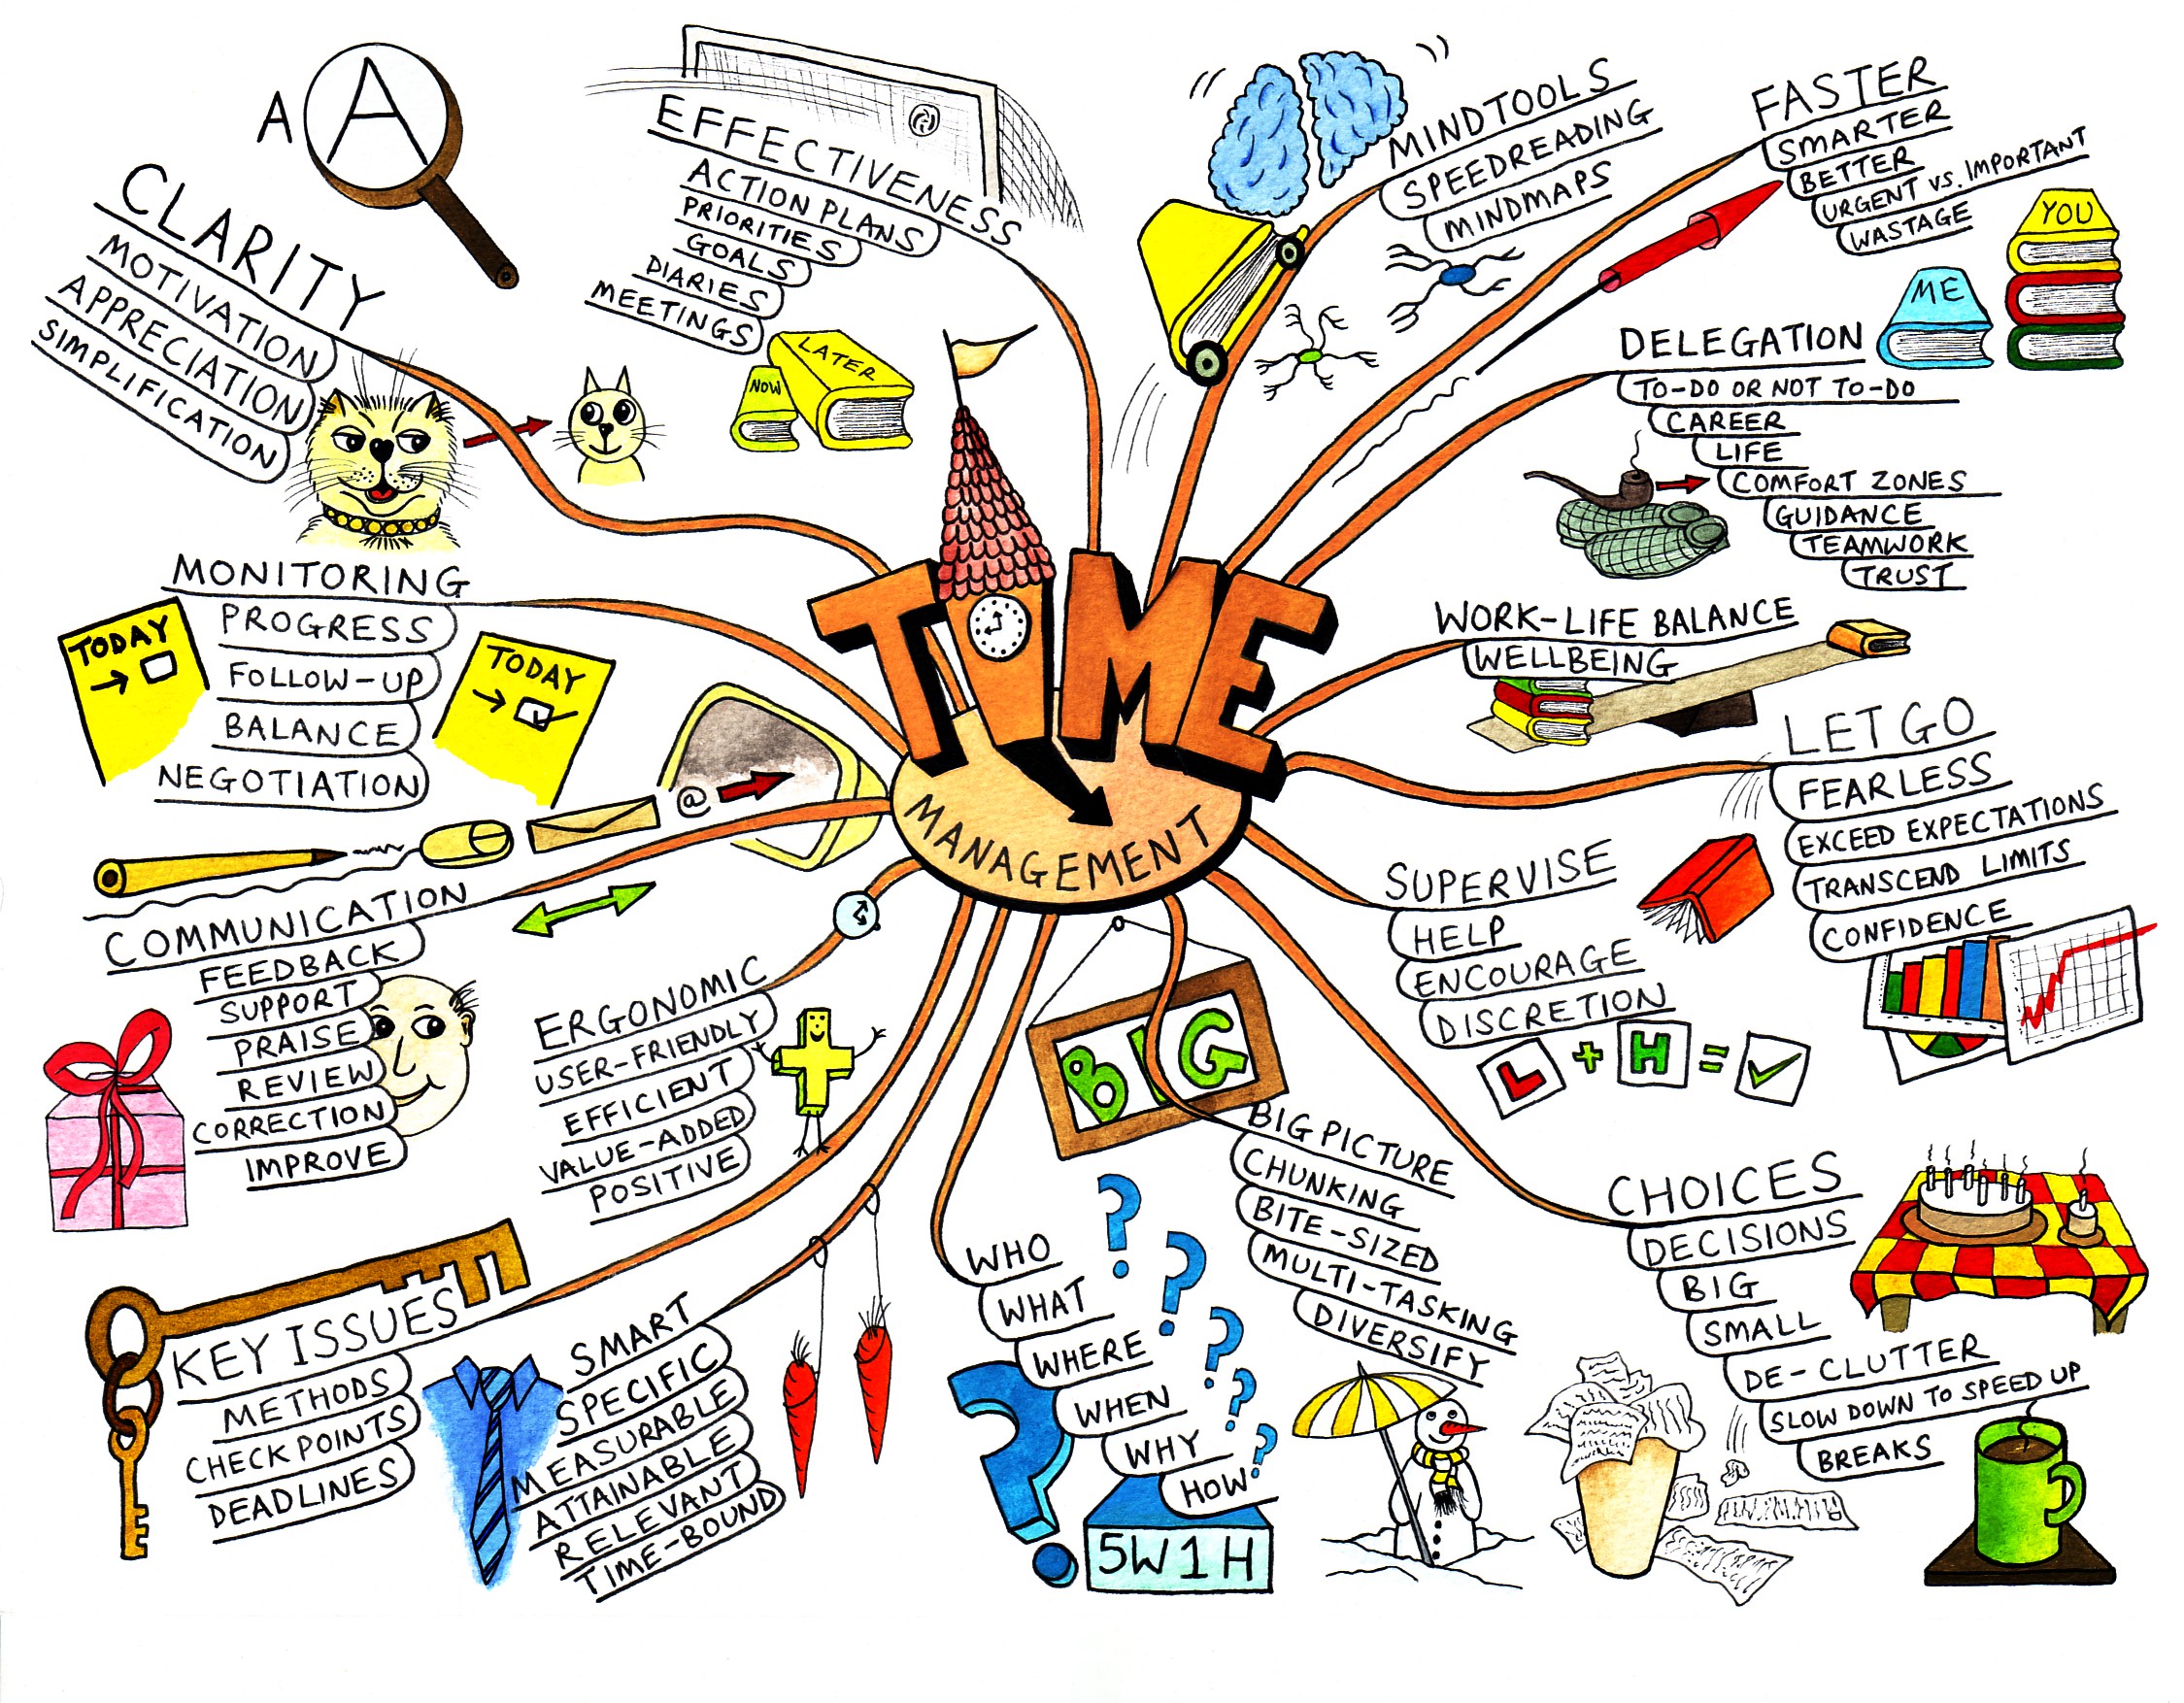
Keonya Booker, Assistant Professor in Teacher Education, recently presented Concepts, Connections, and Constructivism: Mind Mapping for Pre-service Teachers at the 2015 Conference on Higher Education Pedagogy at Virginia Tech. As a result of what she learned at the 2014 Faculty Technology Institute she presented on how she used collaborative idea maps to help students make connections. Below are snippets from her conference proposal
Abstract: Constructivist theory asserts that students attach meaning to their learning by way of predicting, organizing, and evaluating information. Instruction in constructivist-based classes should support students as they actively connect new ideas with prior knowledge. Mind mapping allows students to make associations between both abstract and concrete types of information in creative and imaginative ways. This practice session will explore the use of a popular software program to help pre-service teachers understand major theoretical perspectives in a human development course. Particular attention will be paid to student perceptions of both the tool’s functionality and benefit to learning.
Description of Practice: Mind mapping has myriad uses in education and there are several tools instructors can use to support student learning. At the College of Charleston all elementary and secondary pre-service teachers must successfully complete a Human Development course prior to their fieldwork experience. Since lifespan development traditionally takes a survey approach, breadth of information is emphasized, not necessarily depth. Because we want students to have a strong understanding of a particular topical issue prior to their practicum, the cumulative assignment was developed. For the cumulative assignment, each student group is responsible for exploring a developmental theorist (e.g., Piaget) or current educational issue (e.g., Common Core) and then presenting to the rest of the class. Students are required to use Popplet to coordinate their work and show connections between contrasting ideas. Uses for Popplet include editing, organizing, and drafting mind maps which will be demonstrated in the session. Participants will also see examples of student work and hear how students evaluated the use of the tool in terms of functionality and worth to the overall project.
If you are interested in learning more about Dr. Booker’s presentation or how you can successfully us idea maps in your teaching feel free to contact Dr. Booker or your Instructional Technologist.
Our guest blogger is Robin Humphreys from the Department of Geology. Robin attended the Faculty Technology Institute in 2014. In this report, she details her experiences modifying lecture materials to meet the needs of a visually-impaired student.
Teaching introductory courses has many challenges, such as how to keep student attention in a large lecture hall, engage in meaningful dialogue with more than just the students in the front row, create assignments that are insightful and challenging but can be graded in a timely manner, etc. During the FTI workshop of Summer 2014 we were introduced to many different ways to use technology, such as Poll Everywhere, Kahoot!, and PowToon, in our classrooms to help overcome many of these types of challenges and create stimulating, engaging learning environments. After our week-long workshop, I left the course very inspired and excited to incorporate these new ideas into my introductory Geology lecture courses for Fall 2014.
What I did NOT anticipate was having a visually-impaired student – totally, 100% blind – in my class. So…how do I incorporate technology we learned from the FTI that requires being able to see, such as PollEverywhere, Kahoot, and Powtoon, into a format that is accessible to everyone, including someone who cannot see? Not only did I have to rethink how I presented the material (I primarily use PowerPoint and the Whiteboard for my lecture discussions), but now I had to design lectures and in-class activities for someone who cannot see me, the PowerPoint presentation, or the whiteboard. I quickly had to rethink my approach of using cutting-edge technology in the classroom and went for more of an ‘old-school’, low-tech, hands-on approach.
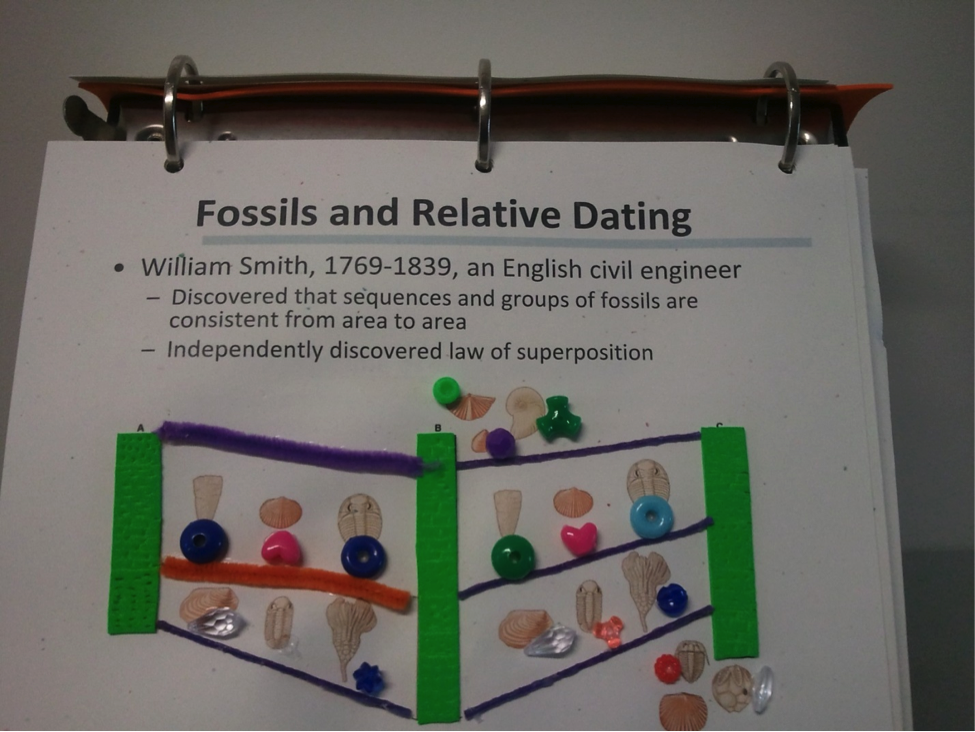
So, how do you describe the Grand Canyon to someone who has no depth perception or concept of scale? To help our student understand the basic concepts and principles of geology, I sought the expertise of Dr. Cassandra Runyon, who has been developing materials for visually-impaired people through her educational NASA workshops for over twenty years. Dr. Runyon created tactile models of the images from my lecture presentations, using an incredible variety of different types of materials (e.g. corrugated paper, beads, foam, felt, etc.). Below is an example using various beads to indicate different fossils within sediment layers in stratigraphic columns. While extremely time-consuming to make, these low-cost and most definitely low-tech models were very instrumental in helping the visually-impaired understand and ‘see’ how Earth works.
Materials for visually-impaired students
Additionally, I recruited several senior geology majors to help me both during class and outside of the classroom. During class, the geology seniors quietly explained the images or graphs on the PowerPoint slides as I was discussing the concepts. To help the visually-impaired student ‘see’ the slides, the geology majors would make simple sketches of the images, using a special type of drawing pad that would transfer the sketches into a raised format that makes it possible to ‘see’ via touch. Generating these simple tactile sketches in real-time was a very effective method of helping the blind student ‘visualize’ the concepts being taught. Outside of class, I provided the geology seniors with copies of my lecture PowerPoint presentations. The geology majors provided verbal descriptions of each and every image, graph, or video in every one of the PowerPoint slides, using the ‘ALT TEXT’ option provided in PowerPoint –an incredibly time-consuming task (see example below). I quickly realized by week two of the fall semester that I did not have the 6-10 hours it was taking for each of the Powerpoint lectures! Fortunately, I have a very supportive department chair, Dr. Mitchell Colgan, who allowed me to hire students to provide the PowerPoint slide alternate text accessible by screen readers. I was very grateful, as the ‘ALT-TEXT’ option in PowerPoint was very instrumental in helping our visually-impaired student understand the images and concepts.
Adding alternative text to PowerPoint slide
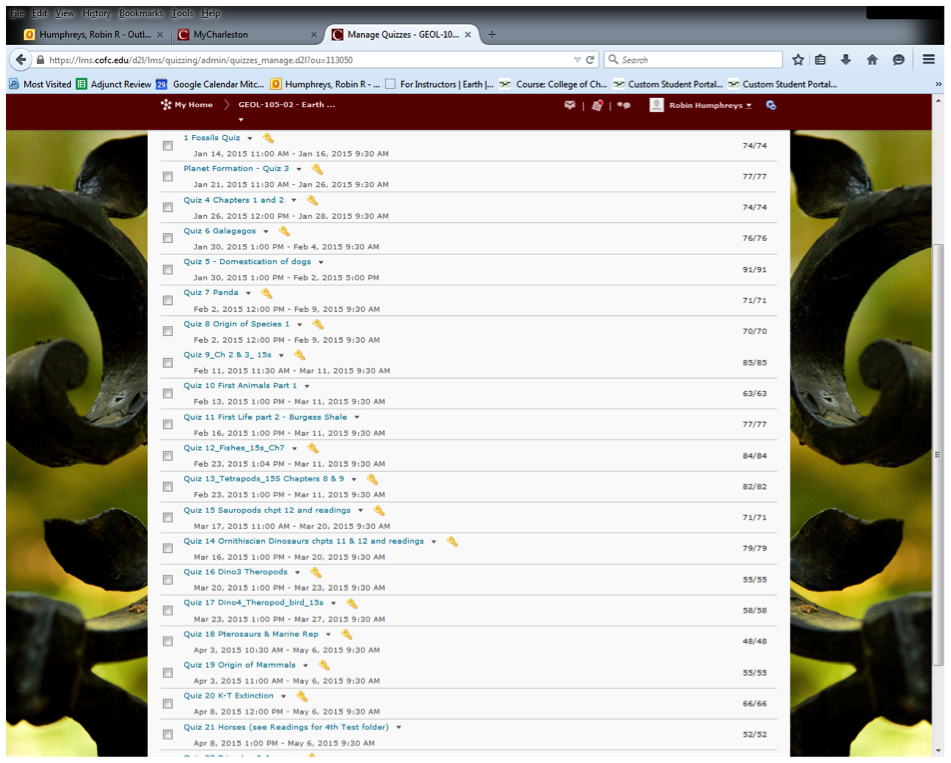
In all of my courses, I have the students take daily quizzes on the upcoming lecture material prior to each class period, in addition to in-class quizzes and/or activities on prior lecture material. These daily quizzes, both in and outside of class, have proven to be quite helpful in both student understanding and retention of the lecture material as I have noted increased exam scores and positive student feedback. I use the College of Charleston’s online learning management system, OAKS, as a tool for providing the lecture materials, readings, and online quizzes (see OAKS quiz list below). My visually-impaired student rarely had difficulty using OAKS and was successfully able to navigate the quizzes and course materials.
Screenshot of OAKS Quizzes, a tool that works with screen readers
I had planned on integrating the new technology learned during the FTI, such as Poll Everywhere and Kahoot!, for the in-class quizzes, but quickly realized these programs would prove to be difficult for someone who cannot see. I resorted to the old-fashioned paper-and-pencil method for my in-class activities instead. I hope to try the new programs, such as PowToon and Kahoot!, along with Poll Everywhere, in the Fall.
One of the other ways of helping our blind student ‘visualize’ was to provide models of the fossils we were discussing. However, many of our fossil samples and models are too fragile to be handled. Kaitlin Woodlief and I tried to make a 3D print of one of our dinosaur models (Triceratops), using the new 3D printer. This process had several issues, primarily with having to generate the 3D scan file, rather than using a file already made (see image below). We are going to continue trying to find ways to make 3D copies of these fragile models for the upcoming year.
A screenshot of the program used to create a 3D triceratops
In summary, while I was eagerly anticipating incorporating new learning technologies and strategies learned in the FTI workshop of 2014 into my Fall 2014 and Spring 2015 courses, I was not able to do so due to the presence of a visually-impaired student in my classes. I relied heavily on low-tech models and pen/paper for helping teach the visually-impaired student. I hope to incorporate the new technologies in my courses this fall (2015), even if I have a course with another visually-impaired student as some models and groundwork are already prepared.
Lastly, I want to point out how much I learned, and benefited, from the experience of teaching such a visual subject as Environmental Geology and Earth History to someone who cannot see. It was an eye-opening (pun intended!) experience and a challenge I found enormously rewarding!
Our guest blogger is Kathleen Janech from the Department of Biology. In 2014, Kathleen attended the Faculty Technology Institute. This blog post is a report and reflection on implementing strategies and technologies from that workshop. Kathleen describes her endeavors to make her lectures more interactive through gamification, and she discusses moving some lecture content online to create time for activities during class.
I decided that I wanted to update one particular section of my Biology 102 course. This is a course for non-majors, and I chose to update the section of the course where I teach about animal diversity and evolutionary connections. This is always a section that students report that they enjoy, but as much as I love all of the diversity seen with animals, I have found that teaching it has become boring. I also used to have a 5 question section at the beginning of the exam on animal diversity, where they would see a picture of an animal for 30 seconds and then have to pick the correct identification in a multiple choice question. Although I like to think that this made them use the knowledge they had acquired, it seemed to just stress them out more about the exam, and being a summative assessment, came too late for them to correct their perceptions.
Therefore, I decided to try a few new things with my class of 35 students in the Spring of 2015. There were so many great ideas that we were exposed to during the FTI, but I had to focus on one area that I could really change in one semester. Overall, I tried to “chunk” my lectures more, and alternate the presentation of material with short videos or a discussion of a handout that they could take home. I would also post more lecture material on OAKS, resulting in a partially flipped classroom. A great advantage of this was that it freed up great amounts of time so that I could fit more activities into the class. The students could access my lecture material at any time, and go over it as much as they needed to, which is great for those who cannot write as fast as others.
In practice, I posted more of the background information on animals (characteristics that were in lists, which had made lecturing on them very boring) on OAKS, where students could access it on their own any time. With the available class time, I planned to try two ways of in-class formative assessment in the form of games. The first game that I tried was “Who Am I?” as a hook at the beginning of class. The students had a lot of material in their notes from class and from slides that they were supposed to have looked at on OAKS. I asked for 3 volunteers, one at a time. When each came to the front of the room, I taped the name of a classification category to their back (such as Phylum Mollusca, or Class Polychaete). They showed it to the class, and then had to turn back around and ask questions of the class to try and guess what category was on their back. Some advantages were that only volunteers were really “on the spot” at the front of the classroom, and the rest of the class could look at their notes to help them out. And it gave them some in-class time to actually try to use the information from their notes and work with it to apply it to something, instead of just waiting to be tested on it. Also, there was not a lot of prep required on my end, aside from writing up and taping the signs on their backs. The disadvantage was that I realized that I had to be very specific about the way they could ask questions of the audience, since I was trying to get them to use the categories that I had presented in class.
The second game that I tried was Kahoot! I used this at the beginning of the class as a hook or “kindling” to get them engaged in the topic. This was by far the biggest success of this section. One advantage of it was that the students really enjoy getting to use their devices in class (and it is a special treat since I do not usually allow devices to be in use during class time). Another advantage was that students were engaged because it was a competition, which they enjoyed, but also something that they could do anonymously so if they made a mistake they could learn from it without having to be embarrassed. Disadvantages include the fact that everyone needs a device on which to play, and not everyone will always have one (they were not penalized if they could not participate), and this took a lot more preparation time for me to get questions ready and make sure that they were good questions. Since Kahoot! was a formative assessment, it let the students know where they were with the material.
Students commented that they really liked my “chunking” strategy – they appreciated seeing short video clips of the different animals and examples of behavior, since it really brings the colors and movement alive, and it helped to break up the lecture. They also noted that they liked having the links to watch later. The “Who Am I” game was not as popular, maybe because I did it earlier in the unit and none of them knew the material yet, and they felt like they were on the spot. The Kahoot! game was really popular. They liked the anonymity, and it was suggested that we play it more often to keep up with all of the material. They liked the competitive aspect and the fact that it was interactive for everyone. Many students commented that they thought they knew the material, but after playing they could see where they needed to do a lot more studying.
In the future, I am going to try to incorporate Kahoot! from the start in all my classes. And, if I prep it far enough in advance, I can include images as part of a question, which will be great and especially applicable for this animal section. I hope to use VoiceThread to free up more time in class for activities and games. I would like to try to work on a “lecture organizer” structure that could be a handout or drawn on the board on the first day of class, in order to help students categorize and prepare for unfamiliar material. In addition, I might try to using Poll Everywhere at the beginning of the class as “kindling” to see how much background information they already know about a particular group, or with a video when I want them to guess what animal I have shown. This would be great to see how much they already may or may not know about many of our local animals. I am going to continue to try and rethink sections of my courses, and incorporate more new ideas. I know of one place in my Biology 111 course where a flipped classroom model would work really well, so that is what I will work on next in the fall.
Thank you, FTI and TLT, for lots of great new ideas!
Multiple choice question creation is challenging and time-consuming. While question banks from the publisher can certainly benefit students by providing opportunities for practice, I prefer to create my own questions for exams to make sure they align with my learning objectives and the material I emphasized in class. While one of the main benefits of using multiple choice questions is the ease and speed of grading, one of the drawbacks is the amount of time invested in the development of each question. Various sources report that professional test item writers spend 30 minutes to 1 hour on just the first draft of a multiple choice question (1, 2). In some ways these numbers are reassuring as I know I am not alone in my occasional struggle with creating plausible distractors (choices) and targeting higher level thinking and reasoning.
During last week’s Faculty Technology Institute, TLT offered a session on best practices to improve multiple choice questions and exams. A number of tips resonated with the participants and led to a vibrant discussion. With multiple choice questions being so common, I thought the rest of the college community might gain new ideas from some of these discussion points. The summer is the perfect time to look back on exams from the past year and evaluate their effectiveness at measuring student learning. You might consider carrying out an item analysis on some of your questions to evaluate the difficulty and discrimination (3). Here are a few practical things to consider if you plan on revising your multiple choice questions:
3 options are optimal (in most cases).
A meta-analysis of over 80 years of research concluded that 3 options, or choices, are optimal for multiple choice questions (4). The analysis examined item difficulty, discrimination, and reliability and concluded that 3 options is best in most settings. I found this paper fascinating, and I was pleased to find out that I can spend less time trying to come up with plausible distractors for each question, while at the same time reducing the reading burden for students. Wahoo!
Parts of a multiple choice question.
Question order does not influence performance or completion time.
The majority of research on this topic indicates that question order has no effect on performance or completion time (5). This is great news as scrambling question order is one strategy adopted by many instructors to prevent cheating. Interestingly, students may perceive exams with randomly ordered questions as more difficult than chronologically ordered exam questions (5). This might be something to keep in mind if you often hear from students that your exams are really difficult.
Following all the item writing recommendations is really hard.
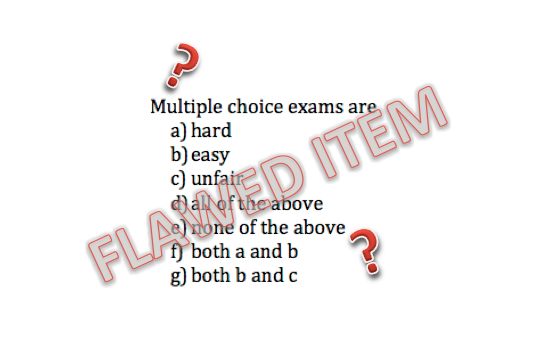
Avoid absolutes (always, never, all, none, all of the above, none of the above, etc).
Avoid negatives (all of the following except, which of the following is not true, etc.).
I know my past exams have included “none of the above” or “all of the above” as options. Faculty attending TLT’s sessions on writing multiple choice questions have commented that these recommendations can be hard, sometimes impossible, to follow. I am hoping to reduce my item flaws by cutting question options down to three.
Poorly constructed questions and exams negatively affect students, and they interfere with interpretations of the exam results. As an instructor, I want to make sure that my questions are reliable and valid. In addition to wanting my exams to align with my learning objectives, I want my exams to be a reflection of student learning in my course and not a measure of reading ability or test-taking savviness. The recommendations listed above have led me to rethink my exam format and reconsider some of my test questions. I hope they are useful to you too!
(1) Van Hoozer, H.L. (1987). The teaching process: theory and practice in nursing. Norwalk, Connecticut: Appleton-Century-Crofts.
(4) Rodriguez, M.C. (2005). Three options are optimal for multiple-choice items: a meta-analysis of 80 years of research. Educational Measurement: Issues and Practice, 24, 3-13.
(5) Pettijohn, T.F. and Sacco, M.F. (2007). Multiple-choice exam question order influences on student performance, completion time, and perceptions. Journal of Instructional Psychology, 34, 142-149.
Our guest blogger is Jeremy Clement, instructor and internship coordinator for Hospitality and Tourism Management. Jeremy was a participant in the 2014 Summer FTI and this post reports on his experience integrating new technology tools into his courses.
FTI Tools in Action: Classroom Engagement & Instructor Versatility Made Simple
I could write a book about all the tools and ideas I walked away with from the Summer, 2014 FTI. As many will attest, it was almost overwhelming. The trick seemed to be to approach the experience with some expectation of how you can utilize the tools and technology you’ll find. I had some notion at the time…but have found since that the skills and abilities I gained from TLT have far more applications than I could’ve ever imagined. So rather than try to report on them all, I’ll simply report on the combination that I’ve utilized, quite successfully, since.
Prior to the FTI, TLT had turned me on to AirSketch for classroom presentations. AirSketch is a free app that simply converts your static presentations – you actually convert your PowerPoint or other materials to PDF first – into an interactive whiteboard in the classroom. In addition to that (and my favorite part) is that it is linked to the classroom projection system via a URL address you call up in the Internet browser on the classroom computer, not via some physical media or content saved directly to the computer itself. Once you enter the URL, the students are exposed to a live version of your presentation.
Your presentation on your tablet or mobile device…not your presentation on the in-room system, wow. That means you can walk throughout the classroom, face whatever direction you’d like and still have access to advance your content or mark up the slide being displayed…all while using your own tablet from the palm of your hand. The freedom is incredible.
For someone who is a bit fidgety, like myself, this allows you to move freely about the class without being tethered to a console or station at the front of the room. I still generally stay in the front for most of my class…but I can’t say enough about the freedom and flexibility inherent in being able to move about and see where I’m at in a lecture, all without having to look back at the screen behind me or staying behind a podium. I find it is more engaging for the students and more natural to my presentation style.
AirSketch is an effective and impressive tool in and of itself. Outside the classroom, I’ve used this technology numerous times to give reports or lead discussions and meetings. Without exception, someone always asks ‘how did you do that?’ I honestly think I might’ve won over some of those audiences simply due to my practiced use of this simple, yet powerful tool.
Haiku Deck title slide
Now here’s where the FTI really amped that up to another level. Haiku Deck was introduced during the FTI as an alternative to PowerPoint for creating engaging and dynamic presentations. I have to say, I was instantly hooked. The program or app (Haiku Deck is accessible via a website or can be downloaded as an app) essentially pairs your presentation content with an expansive database of beautiful, vibrant photographs via the use of its unique correlative categorization feature.
Essentially, you type in the main theme of the slide and they find a plethora of engaging and interesting photos and images that follow the same theme or concept. I don’t claim to know exactly how it works, only that it is both effective and fun to use. My only issue is I tend to get lost looking at all the cool images and trying to pick the one that is most appropriate and also the most engaging. It allows me to mix up a little left- and right-brain activity and really bring more of my personal style and creativity into what can sometimes be dull and emotionless presentation material.
Adding user’s own images to Haiku Deck
Not only does Haiku Deck offer their own photo library, you can also include your own images. This feature allows you to integrate photos, diagrams, or other materials as the backdrop for the slide and details surrounding the subject. I’ve provided some examples to give you an idea of how this might be integrated.
The unique design function of Haiku Deck does have some limitations, but I developed a workaround that I think everyone can benefit from. Essentially, I usually need to include more data on a slide than what Haiku Deck’s presentation builder will allow. I found this frustrating at first and thought that would limit its usefulness for my particular course given the volume of information I need to display as a part of my presentation.
Haiku Deck slide edited inside Powerpoint
So, my solution was to use Haiku Deck to build the base slide – typically including a graphic and a slide title or subject line. Then I would download the presentation into PowerPoint, one of the various options they provide for exporting your content. I would then use the tools available in PowerPoint to add content over top of the Haiku Deck slide. The result was what I consider a beautiful balance of engaging graphics and pictures supplemented by the course materials I need to deliver in a more comprehensive format than what Haiku Deck had to offer.
Poll Everywhere results added to Haiku Deck slide
Now, once I had the PowerPoint deck fully developed, I convert that presentation to a PDF. From there, it’s a simple matter of pulling it up via AirSketch and calling up the URL in the classroom. My course evaluations were the best in my department, certainly in part due to the use of this unique blend of tools and technology. Of course, I didn’t stop there – I also integrated other FTI-introduced tools like Poll Everywhere which can be seen in my examples here as well.
The versatility and level of engagement I was able to accomplish as a result of information I gathered in the FTI have surely improved my teaching style as well as my personal appetite for trying and implementing new tools and technology in the classroom. Honestly, even the fails are learning opportunities as the class has to work together to find a better way to tackle the challenge. My evaluations are one indicator but certainly not the only one I’ve received.
If you’ve gotten this far and still find this interesting, I would encourage you to check out Haiku Deck’s pending software launch – Haiku Deck Zuru. This new offering, not yet released but eligible for subscription as a charter member, promises to utilize artificial intelligence to essentially read and convert a preexisting presentation into a Haiku Deck in one fell swoop. I find that both fascinating and exciting.
Acclaim is a web platform which facilitates asynchronous discussion around video content. Students and instructors can add time-stamped comments that link to moments in each video. Each comment is clickable, and once clicked, the video will jump to the relevant moment in the video. Students can see and respond to comments at any time.
Users add videos to Acclaim in one of three different ways:
By embedding YouTube or Vimeo videos;
By uploading video files stored on a hard drive or mobile device; and
By using the built-in webcam feature to create and upload a video in real time.
How could I use Acclaim?
Assessing student presentations.
Peer evaluations of presentations.
Self-evaluations of presentations.
In flipped classrooms during which students watch video lectures outside of class.
Acclaim would be an ideal tool in courses that involve any type of oral presentations, demonstrations, or performances.
Why should I use Acclaim?
Watching one’s own recorded presentation and reading evaluations from peers and instructors can be an excellent way to identify strengths and weaknesses, and thus improve one’s future performances. Self-assessment encourages critical reflection, increased awareness of skills, and goal setting while peer-assessment develops empathy and encourages students to reflect on their own work while evaluating others.
Acclaim provides a free and simple platform that facilitates such self, peer, and instructor assessment.