1-1-1, Faculty Technology Institute, iPad, Mobile

Faculty Guest Post: eTextbooks and iPads as teaching tools

Our guest blogger is Vijay Vulava, an associate professor in the Department of Geology and Environmental Geosciences. Dr. Vulava was a participant in the Summer 2013 Faculty Technology Institute.

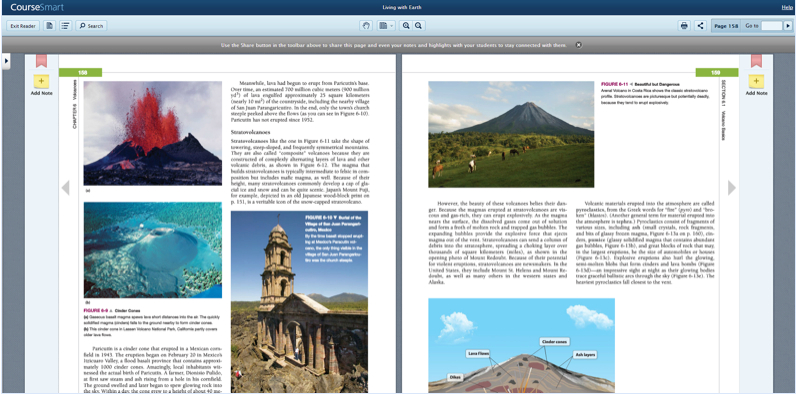
Like any of you at the College, I used to carry a few textbooks on me a lot of times. I had even resorted to keeping a second copy in my home, so I didn’t have to shuttle textbooks with me. One of the great advantages of having a connected device (laptops, tablets, smartphones, etc.) at your disposal is the ability to access digital versions of your textbooks (eTextbooks) anywhere there is internet access. This, of course, depends on whether the textbook publishers make eTextbooks available. A few years ago a publisher’s representative introduced me to CourseSmart (http://www.coursesmart.com/), a consortium of textbook publishers that publish their textbooks online. An exact copy of a textbook I requested was made available in eTextbook format and was accessible on any internet browser within seconds – I just had to login to my account. On this site, all eTextbooks are available for free to any instructor (you have to request access for each textbook), so you get to review a bunch of textbooks before you adopt one for the class. The eTextbooks look identical to hard copies and contain basic note taking, highlighting, sharing, and printing tools. And because the eTextbooks are available on any computer, you could easily take screenshots of selected pages, sections, or pictures to include in your lectures and notes. I found this very convenient in helping my students navigate through textbooks or helping them find information they need. The big downside of this eTextbook platform is that the publishers have not exploited the full potential of eTextbooks. The content in the text is not hyperlinked within the document (e.g., you cannot click on a figure citation to go to the figure), with the publishers’ own teaching resources (often videos, photos, animations, etc. provided in a CD with the textbook), or to any sources online (e.g., videos, government websites, etc.). The publishers could certainly learn a lot about how to make good eTextbooks by looking Al Gore’ 2009 publication, Our Choice and the accompanying app (http://pushpoppress.com/ourchoice/).

iPads have now made accessing eTextbooks more convenient. CourseSmart apps are now available for Android, iOS, or Windows tablets. I now carry these eTextbooks to class, flip to the required section, and show to my students. These eTextbooks are also available offline when there is no internet access available. I often take screenshots of the eTextbook sections right on the iPad (press Power and Home buttons at the same time and find the screenshot in the Camera Roll) and make annotated notes for the class. TLT’s website has tutorials for projecting from an iPad to a digital projector (http://goo.gl/9EXVw).

There are other eTextbook platforms such as Amazon Kindle and Kno that offer alternatives to CourseSmart, but I did not find as large a textbook selection in either of these platforms. Amazon Kindle does offer a large selection of wider interest titles than any other textbook consortium. In addition to the Kindle eReader, the Kindle app is available for all major connected devices as well.

CourseSmart is a good option for students that are digitally adept and those that prefer content from devices rather that physical textbooks. They can rent textbooks for 180 days and the prices are a lot less than what they would pay for a hard copy at a bookstore.
adobe scan on a phone
Distance Ed, instructional technology, iPad, Mobile, Productivity, Share

Tech Tip Tuesday – How to Scan Handwritten/drawn Work to a PDF to submit in OAKS

With the College operating online, I know it’s difficult for some discipline whose work isn’t easy to do online, for example Math and Drawing.  If the assignment you wish to give is better suited to the student handwriting or hand-drawing something then just have them scan it!  This is also a great option for faculty who have semester long notebooks or portfolios that are turned in.

A FREE app that students can use (and you for that matter) is Adobe Scan. Adobe Scan works on phones and tables and makes it so easy for users to take pictures of multiple items and have one PDF created.

Check out the Adobe Scan page to download the app and here’s a tutorial for you and your students on how to use the app:

Kahoot Challenge
Classrooms, Distance Ed, instructional technology, iPad, Mobile, Pedagogy

Kahoot! Now Has A New Out-of-Class Feature!

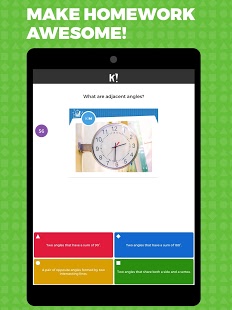
Kahoot mobile screenshotKahoot! is a game-based learning platform that, up until now, could really only be used face-to-face.  But great news, it now has an out-of-class feature as well that can be used for homework or for online courses.  I know many of you teaching online has wanted to use Kahoot! but haven’t been able to.  Well now you can!

The new feature is called Challenge and does require the Kahoot! App to play.  When you (or your students) want to start a Challenge just click on an existing Kahoot! (or you can make a new one) and at the top, click Challenge.  You then set a due date by when the challenge must be completed.  Lastly, you are given a Challenge link and PIN that you then share with your students, either via OAKS, Email, or Google Classroom.  The student really just needs to type in the PIN into the Kahoot! app and they go on with the game as they would in class.  At the end, the instructor can see how everyone in the class did.

The only thing I’m not in love with is that Challenges can’t be done on a computer and most young children (for EHHP) don’t have cell phones or iPads.  For a college classroom this shouldn’t be an issue.

Here’s how it works:

Kahoot! can be used to:

  • Review, revise and reinforce
  • Re-energize and reward
  • Get classroom insights
  • Gather opinions
  • Motivate teamwork
  • Challenge past results
  • Join global classrooms
  • Introduce new topics
  • Great for competitions
(taken from Inspiring Ways to Kahoot! )

Also, as you learned above, there is a new mobile app to make it even easier to join and play!  Check it out on their Mobile app page.

#onenewthing Padlet
Collaboration, discussion, instructional technology, iPad, Mobile, Portfolio, Presentation, Research

#OneNewThing – Padlet

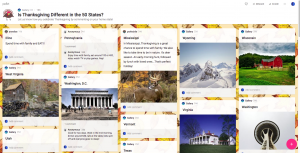
padlet screenshot“Padlet is a virtual wall that allows people to express their thoughts on a common topic easily. It works like an online sheet of paper where people can put any content (e.g. images, videos, documents, text) anywhere on the page, together with anyone, from any device.” (Mrs. Treichler)

Platforms:  Web, iOS, Android, also has plugins for Chrome and WordPress


How It Works


Uses for Faculty & Students


  • Create a blank board and share it (either with specific people via their Padlet account, or via a general link.
  • Double-click on the board to add a new “sticky” note.
  • You can add:
    • Text
    • Audio
    • Video
    • Images
    • Files
  • Drag the notes around to organize and sort them.

Works on a computer or almost any mobile device.

  • Discussion and collaboration
  • Constructing a classroom code of conduct or an assessment rubric with your students
  • Backchannel where students can write questions during or before class
  • Exit ticket
  • Brainstorming
  • Planning
  • Student-to-Student image sharing
  • Writing prompts and collaborative writing
  • Student introductions
  • KWL Charts
  • Curation
  • Flow maps
  • Opinion forums
  • Inspiration wall
  • Portfolios
  • Website bookmarking tool
  • More…
  • Even more…

Get your padlet account today


Accessibility, iPad, Mobile, TLT

App recommendation: Prizmo – Scanning, OCR and Speech

What is ?  Take a photo of a document then Prizmo converts it to text and then allows you to hear it read aloud or save/export as a searchable PDF.

Price: $ 9.99

Platform: iOS also for Mac supporting OS X 10.10 or higher for $49.99

Android users – see the following site for a list of Android apps that are similar to Prizmo: http://appcrawlr.com/app/related/1113421 

More Information:

http://www.creaceed.com/iprizmo

https://itunes.apple.com/us/app/prizmo-scanning-ocr-speech/id366791896?mt=8 

User review of Prizmo http://www.usatoday.com/story/tech/columnist/saltzman/2013/08/27/prizmo-app-documents/2709095/


iPad, Mobile, Productivity, TLT

App recommendation: Clear -Tasks, Reminders & To-Do Lists

At last week’s TLT Faculty Open House we asked those that attended to recommend a favorite app and Clear was a clear favorite!

What is Clear?  An easy to use to-do list and reminders app.

Price: $4.99

Platform: iPhone, iPad, Apple Watch and Clear for Mac which is available separately on the Mac App Store

More Information: 

To install and to learn about the app from the developer visit:

https://itunes.apple.com/us/app/clear-tasks-reminders-to-do/id493136154?mt=8 

One review of Clear as well as  a comparison to other to-do apps:  http://thesweetsetup.com/apps/best-simple-to-do-list-app-ios-mac/

1-1-1, Innovative Instruction, iPad, Web 2.0

Faculty Guest Post: Nearpod as an alternative to PowerPoint

This month’s faculty blogger is Heidi Collins, who is Adjunct Faculty of French in the Department of  French-Francophone-Italian Studies.

____________________________________________________________________________________________________________

Looking to shake up lectures from the typical Powerpoint and searching for a vehicle that better integrated student response in the presentation, I experimented with Nearpod during the Spring 2016 semester. This app allows an instructor to create a presentation and then push a slide show out to a student’s personal device. Perhaps more importantly, it features built-in activities and quizzes that require the students to interact with the presentation. Student responses from these exercises are available for the teacher to view and subsequently share with the class if they wish. The answers can also be saved and viewed later by the instructor for grading purposes or more in-depth evaluation.

The free version of the application gives you access to the basic features while purchasing the next level opens up more student activity modules. The Nearpod website allows you to create your presentation but the design capabilities are limited. It is easier to create the look you want by creating your slides in Powerpoint, saving them as images, and them placing them in your Nearpod presentation. You can also add activities like open-ended questions, free-draw, and quizzes to your slides. There are numerous Nearpod lessons available for free or a small fee. However, most of these are geared towards secondary school students.

Once you have created and published your presentation, you are ready to use it in class. When you run the presentation, the students will use the code provided to logon to the presentation and will see the individual slides on their own computers or tablets. You can open the application on the classroom computer, but I found it worked better to run the presentation from my iPad and log the classroom computer into the presentation as the students do. This allowed me to project on the big screen what the students were also seeing on their own screens and reference it as we worked.

The first time I used Nearpod with my classes, I requested students bring a laptop, iPad, or other tablet to class with them. While it is possible to view the presentations on a cellphone, the small screen size limits the students’ ability to complete activities. Unfortunately, for a class of 20 students, I only had 4-6 students bring devices with them. This meant that groups of 3-4 students were working together which ultimately led to one or two students being less engaged in the activity. Luckily, TLT allows instructors to check out iPads for classroom use on a short-term basis. Doing this allowed us to have 1-2 students per device which led to greater student participation.

One of the downfalls of the application is that the whole class must stay together. This can be difficult if the students are working on an activity at different rates. In particular, if a student hasn’t submitted a response to a question, once the instructor pushes the next slide, half-finished responses will be lost. To alleviate this problem, I asked students to submit any partial responses when we were ready to move on.

One of the great things about Nearpod is that you can view the students’ responses and choose which ones to show to the entire class. This could allow you to highlight a particularly interesting response or perhaps a response with a common error that you wish to address. When working with grammar, I often prefer to have an incorrect response given instead of a correct one because it creates a teaching moment. However, students often only want to volunteer a response when they are sure it is the correct answer. With Nearpod, every student submits an answer, and I get to decide which ones we should look at together. I’m also able to quickly judge if many students are making the same mistakes.

The free draw activity also lends itself well to the language classroom. I created a lesson in Nearpod on prepositions of location. Using the free draw activity, I gave my students simple commands for drawing a picture. (Draw a girl. Draw a flower next to the girl. Draw a boy behind the flower. Etc.) Everyone was able to draw and then we were able to easily view the students’ drawings as a class and discuss them further in the target language.

Overall, Nearpod worked well to increase active student participation and provided a different way of doing things that helped engage the students. It also forced me to slow down a bit and gave me a better idea of how well the students were keeping up. Additionally, the premium features include being able to assign the presentations as homework which would be interesting to try as part of an online course.

Best Practices, iPad, Teaching Advice, TLT

Take Note: Self-Assessment Improves Teaching

As the semester winds down, I’ve begun reflecting on the successes and failures of my class.  Which topics led to fruitful discussion?  Which assignments caused students the most trouble?  Which instructions did I constantly have to clarify?  Which activities backfired?  As important as this type of self-reflection is, when I wait until the end of the semester, my memory sometimes fails.  So I’ve established the habit of journaling throughout the semester.  But if you’re like me, your days are full and it’s easy to put self-assessment on the back burner.  How do you find the time?  The answer is to make the process as quick as possible.  Here are some suggestions:

Add Post-Its® to your lecture notes:

If you use paper lecture notes, Maryellen Weimer, the editor of Faculty Focus, suggests attaching sticky notes that contain your teaching to-do list:

“A colleague once shared with me that after class ends, she attaches a small sticky note on the materials from that day, and then imagines she will only have 15 minutes for prep the next time she teaches that material.  She writes her to-do list on the sticky note: find more examples of X, create a better question about Y, add another graphic to the Powerpoint slide about Z, etc.”

This is an incredibly simple way to reflect in the moment before you forget what worked and what didn’t.  This will ensure you know what improvements need to be made when next semester rolls around.

Use a note-taking app on your phone:

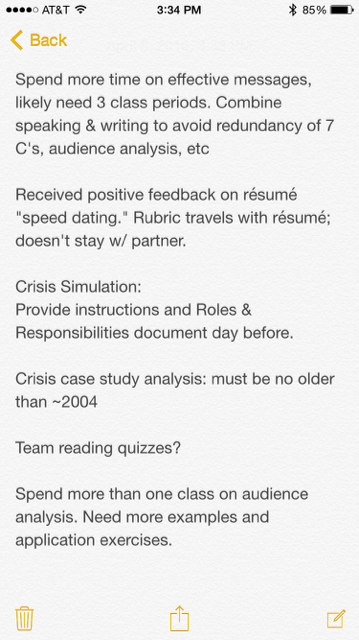
Both iPhones and Androids come with apps already installed that allow you to quickly type notes (iPhones come with a “notes” app and Androids tend to come with a “memo” app).  After a particularly successful or terrible class, I will take 1-2 minutes to type what occurred.  Were my instructions unclear?  Did I not allow enough time for group work?  Did that reading spark an enthusiastic discussion?  This takes very little time and could be done while you’re still in the classroom.  If you have to hurry to your next class or meeting, use the voice memo app that also comes standard on iPhones and Androids.  As you’re walking, talk into your phone’s microphone, and record your observations.  By recording my questions, ideas, and concerns after each class, I’m creating a fantastic resource to use when I prepare for the next semester.  Here’s an example of my iPhone notes:

Example of using the iPhone notes app for quick teaching self-reflection notes


Use a note-taking app on your tablet:

For those who own tablets, there are a multitude of sophisticated apps that make note-taking quite delightful (just ask my colleague, Mendi, who takes some of the most beautiful notes I’ve ever seen!).  These apps work best if you use a stylus (which you can borrow from TLT).  It takes only moments to open the app and jot down your thoughts about the quality of each week’s classes.  Here are some of TLT’s favorite apps:

Mendi’s recommendation: Notability ($4.99, iOS) combines typing, handwriting, photos, PDFs, and audio recordings to create multi-layered notes.  If you’re a frequent notetaker, it’s worth every penny.

Laura’s recommendation: If you’re an Evernote rockstar like Laura, you can’t get much better than Penultimate (free, iOS).  Its inking technology looks and feels like real pen and ink, and as you write, the page keeps up with you so you never run out of space.  Plus, it syncs with your Evernote account so you have access to your notes from just about anywhere.

Amy’s recommendation: Squid (free, Android) allows you to easily markup PDFs to fill out forms, grade papers, or sign documents. Import images, draw shapes, write on a virtual whiteboard, and add typed text to your handwritten notes.

Other options include:

ColorNote Notepad (free, Android)

Inkpad Notepad (free, Android)

UPAD ($5.99, iOS)

Paper (free, iOS)

Add notes to your Powerpoint slides:

Kathleen Janech, adjunct professor of Biology, adds notes to herself below each Powerpoint slide:

“This way my ideas are right where I need them every year, when I am ready to think about and work on that topic. And if it is something that I realize I need to do weeks in advance, I put a slide note into a lecture earlier in the semester to remind me to work on that.”

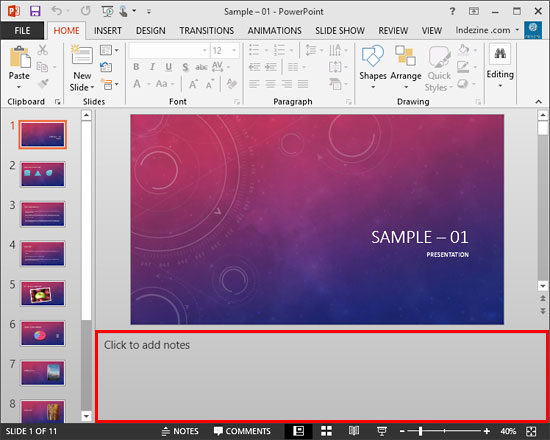
For those who aren’t keen on using apps and worry about losing sticky-notes, this is a fantastic way to keep an ongoing record of your teaching observations.  Most presentation software have a designated area for notes, including Google Slides, Keynote, and Haiku Deck.

add notes to Powerpoint by clicking inside the notes area underneath each slide. This area can be expanded or collapsed.

Why bother with all this?

Teaching is a continuous process of exploring, learning, and evolving.  If we fail to prioritize self-reflection, we become stagnant and ineffective.  So do yourself and your students a favor by getting in the habit of routinely evaluating what happens in your classroom.  You don’t have to do it after every class period, or even every week, but don’t wait until the end of the semester.  You’ll forget less if you write it down.  As poet and author Harley King notes: “So much is buried in our lives that we forget what we have learned.”

iPad, TLT

App of the week: Marvin – eBook reader for epub

Looking for a eBook reader that allows you to export notes you have taken while reading, has full text search and a sleep mode?  Then Marvin is the e-Reader app for you!

Here are just a few of the features noted on the iTunes store

  • 2 column layouts in both portrait and landscape on the iPad
  • A reading timer
  • Customizable gestures
  • Powerful highlighting and annotation tools
  •  Intelligently search for and pin web content such as articles, reviews and videos
  • Sorting, filtering and grouping
  • Virtually all the content you see, create and find can be exported and shared
  • All exported content can be opened in web browsers and word processors for further reference

Price: $3.99

Platform: iPad and iPhone

More Information:

To see all the features and to download, visit:https://itunes.apple.com/us/app/marvin-ebook-reader-for-epub

For a comparison of Marvin and other e-readers apps go to: http://www.cultofmac.com/269542/winner-best-ebook-reading-app/

Checkout Equipment, iPad, Mobile, TLT

REVIEW: Apple’s iPad Pro and the Apple Pencil

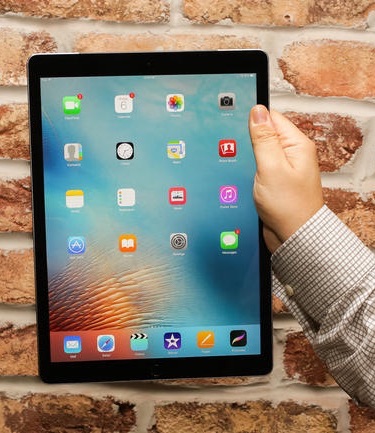
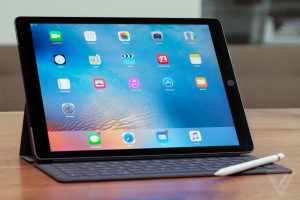
iPad Pro with keyboard and PencilThe iPad Pro is Apple’s newest edition to the iPad family.  It has an expansive 12.9 inch Retina display and is much faster than any of the other iPads on the market (twice as fast as the iPad 2).  TLT recently purchased one and I couldn’t wait to try it out.

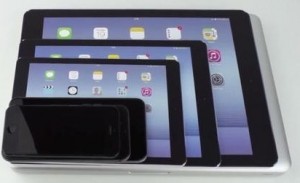
My first impression is that it’s big, really big.  It’s as wide as the iPad mini is tall.  The display is beautiful, crisp and clear.  It’s also faster and is great for streaming video.

What I loved…

Artist drawing on the ProI really did like the larger screen for some things, such as Excel, and for the split screen function.  I can use the split screen on my iPad mini but the screen is so small it’s not very effective.   The iPad Pro screen is actually larger than my MacBook Air screen so the real estate you get is amazing.

Apple PencilThe Apple Pencil was my favorite part of the iPad Pro.  I’m sad that it will not interact with any other iOS device because I’m in love with it.  The Pencil is far superior to any other stylus I’ve tried, and believe me, I’ve tried a lot.  Everything from the weight, to the feel, to the way it writes if far superior.  It’s pressure sensitive so, just like a real pen, pressing harder yields a darker, thinker line.  Depending upon the app you are using it also allows for shading.  In ArtRage, turn the Pencil on it’s side to shade like you would with an analog pencil (you know, the No. 2 kind).  In addition to ArtRage I used it extensively in Notability.  The control in writing produced handwritten notes that were comparable to a regular pen and paper.

ipad-pro-will-also-be-launched-on-wednesday-along-with-new-iphonesiMovie was my second favorite thing about the Pro.  It looks go good and was so easy to manipulate on the bigger screen.  The audio, via the two speakers, sounds really good and clear as well.  Over the years I have become quite adept at using iMovie on my phone so a small screen is not a deal breaker for me, but this was just beautiful and so easy to see.


The battery life is AMAZING!!  I’ve had it, and used it for several weeks and have only charged it once. It’s considerably better than the battery life of any of my other Apple products (iPads, Phones, Laptops).

What I didn’t love as much…

At the end of the day, it’s still an iPad which means that it won’t do all the things a laptop will do.  While there are a few programs (AutoCad 360) that take advantage of the new platform most of them just benefit from the larger screen.  Other than using the Pencil it’s just a bigger version of my iPad Mini.  For most things I like the mini better because of portability.  I’m not an artist or an engineer so I’m not really in need of these programs or the super large screen.  The Pro is hard to use without a desk or a table.  It’s not easy to use on the bus and not easy to cary around with me.

Would I recommend the iPad Pro?

Yes, but only to some people.

  • If you are an artist the YES YES YES.  The larger screen combined with the Pencil is hard to beat.
  • If you are an engineer then MAYBE.  Some of the apps work well on the Pro but are still not as powerful as on a laptop so you won’t be able to access all of the features you may need.
  • If you have some motor control or vision issues YES.  The larger screen helps with vision and the ability to hit the buttons you are trying to hit on the screen.
  • Everyone else who likes their iPad but thinks the Pro would be super awesome, NO.

It doesn’t do much that a regular iPad won’t do but costs a lot more.    Here’s how pricing shakes out after a quick internet search:

  • iPad Pro (base model) with Pencil and Keyboard – $799 + $99 + $169 = $1,067
  • iMac Air (base model) – $899
  • Microsoft Surface Pro 4 (base model with keyboard and stylus) – $899 + $129 = $1,028

With both the Air and the Surface you are getting a fully functioning computer processor that can run any application you need.

In Conclusion…

I’m an Apple junkie so I wanted to love the iPad Pro.   I really did.  And I do, but only if you have unlimited funds, which I don’t.  As you can see, we couldn’t even afford the keyboard : ).  However, don’t take my word for it.  Soon you can try it out for yourself.  Soon, TLT will be making the iPad Pro and Pencil available for regular checkout.  If you are interested in trying it for yourself just contact your Instructional Technologist and we’ll let you know when it will be available.