Read&Write Screenshot of a webpage highlighted
Accessibility, Best Practices, instructional technology

Improve your, and your students’, reading and writing confidence

Did you know that the College has purchased a site license for Read&Write from TextHelp (thanks Disability Services). Read&Write is a toolbar for your computer or web browser that allows the users to increase their literacy.  This toolbar works in any application on your computer, allowing you to:

  • have the computer read digital documents to you
  • highlight any website or document to assist with summarizing and categorizing
  • suggest words as you type (prediction) to develop writing skills
  • convert inaccessible text, such as a screenshot, into accessible text
  • proofread your documents
  • and more…

Read&Write toolbar screenshot

I use Read&Write to read difficult or boring documents out loud while I read it.  It helps me stay focused especially if I’m not keen to read it to begin with.  It also has a Screen Masking tool which is another tool to help prevent loss of focus.

These are just a few of the things Read&Write can do without much, if any, instruction.  However, if you want to do more then you can use it to

  • give you word definitions.  There is even a picture dictionary which can be good for non-native speakers.
  • create audio files from typed text.
  • check verbs for agreement.
  • create a collection from your highlights.
  • create a vocabulary list.
  • add text facts to a web resource (such as notes, title, author, etc.).
  • export the notes you create to a Word document.
  • translate words
  • similar word checker

These tools can definitely help users with disabilities but it’s important to know that they can help EVERYONE become more literate.  We all have times where focus or vocabulary or writing is an issue and this is a tool that can help.

If you want to know more visit Read&Write Quick Start and Read&Write Getting Started.

Installation:

  1. Go to https://www.texthelp.com/en-us/products/read-write/read-write-for-education/
  2. Click Try Now choose your platform and follow the normal installation instructions for your platform
  3. Once it’s installed, open it up and accept the User Terms, click OK.
  4. IMPORTANT: When asked to sign in you MUST choose GOOGLE and use your CofC email and password.

If you have problems getting it installed or logged in, contact the CofC Service Desk at 843-953-DESK.

SAS WRITING REVISER
Google, instructional technology, TLT

#OneNewThing – SAS Writing Reviser

SAS Writing Reviser is a Google Docs add-on that helps to create better writers.  Writing Reviser collects and highlights a multitude of potential flaws in a paper or writing sample and displays it in categories for the writer to review and change if desired.

The goal of the Writing Revisor is to make the writer think about the possible flaws and decide how best to fix them.

–  How It Works

Uses for Faculty & Students

  • Search for and install the SAS Writing Reviser’s add-on in your Google Docs.
  • Open a paper and run the Reviser.
  • Select the category you want to see and watch as all of the items that match that category are highlighted
.
  • Require students to run the report once they have completed their paper or writing project then require them to fix the problems they wish to fix and rerun the report to show their improvement.  The student must turn in the assignment and the report.
  • Students can use it check their writing for common mistakes.  Much more robust than any Microsoft Word features.

Tip:
Start by running the report and working on your top one or two areas of concern.  Working with the entire report is overwhelming.

What it looks for:SAS Writing Navigator - planner, drafter, reviser, publisher

  • Wordiness
  • Prepositional Phrases
  • Passive Voice
  • Simple and Run-on Sentences
  • Subject-Verb, Prepositional Phrase, and Subordinate Clause Openings
  • Weak Verbs and Verb Tenses
  • Cliches & Jargon
  • Misplaced and Dangling Modifiers
  • and much more

SAS Writing Reviser Add-on for Google Docs

For more information on SAS Writing Resources visit https://goo.gl/zQ1yCD

Best Practices, iPad, Teaching Advice, TLT

Take Note: Self-Assessment Improves Teaching

As the semester winds down, I’ve begun reflecting on the successes and failures of my class.  Which topics led to fruitful discussion?  Which assignments caused students the most trouble?  Which instructions did I constantly have to clarify?  Which activities backfired?  As important as this type of self-reflection is, when I wait until the end of the semester, my memory sometimes fails.  So I’ve established the habit of journaling throughout the semester.  But if you’re like me, your days are full and it’s easy to put self-assessment on the back burner.  How do you find the time?  The answer is to make the process as quick as possible.  Here are some suggestions:

Add Post-Its® to your lecture notes:

If you use paper lecture notes, Maryellen Weimer, the editor of Faculty Focus, suggests attaching sticky notes that contain your teaching to-do list:

“A colleague once shared with me that after class ends, she attaches a small sticky note on the materials from that day, and then imagines she will only have 15 minutes for prep the next time she teaches that material.  She writes her to-do list on the sticky note: find more examples of X, create a better question about Y, add another graphic to the Powerpoint slide about Z, etc.”

This is an incredibly simple way to reflect in the moment before you forget what worked and what didn’t.  This will ensure you know what improvements need to be made when next semester rolls around.

Use a note-taking app on your phone:

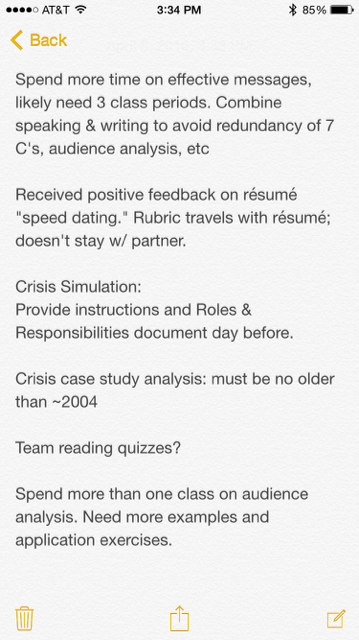
Both iPhones and Androids come with apps already installed that allow you to quickly type notes (iPhones come with a “notes” app and Androids tend to come with a “memo” app).  After a particularly successful or terrible class, I will take 1-2 minutes to type what occurred.  Were my instructions unclear?  Did I not allow enough time for group work?  Did that reading spark an enthusiastic discussion?  This takes very little time and could be done while you’re still in the classroom.  If you have to hurry to your next class or meeting, use the voice memo app that also comes standard on iPhones and Androids.  As you’re walking, talk into your phone’s microphone, and record your observations.  By recording my questions, ideas, and concerns after each class, I’m creating a fantastic resource to use when I prepare for the next semester.  Here’s an example of my iPhone notes:

Example of using the iPhone notes app for quick teaching self-reflection notes


Use a note-taking app on your tablet:

For those who own tablets, there are a multitude of sophisticated apps that make note-taking quite delightful (just ask my colleague, Mendi, who takes some of the most beautiful notes I’ve ever seen!).  These apps work best if you use a stylus (which you can borrow from TLT).  It takes only moments to open the app and jot down your thoughts about the quality of each week’s classes.  Here are some of TLT’s favorite apps:

Mendi’s recommendation: Notability ($4.99, iOS) combines typing, handwriting, photos, PDFs, and audio recordings to create multi-layered notes.  If you’re a frequent notetaker, it’s worth every penny.

Laura’s recommendation: If you’re an Evernote rockstar like Laura, you can’t get much better than Penultimate (free, iOS).  Its inking technology looks and feels like real pen and ink, and as you write, the page keeps up with you so you never run out of space.  Plus, it syncs with your Evernote account so you have access to your notes from just about anywhere.

Amy’s recommendation: Squid (free, Android) allows you to easily markup PDFs to fill out forms, grade papers, or sign documents. Import images, draw shapes, write on a virtual whiteboard, and add typed text to your handwritten notes.

Other options include:

ColorNote Notepad (free, Android)

Inkpad Notepad (free, Android)

UPAD ($5.99, iOS)

Paper (free, iOS)

Add notes to your Powerpoint slides:

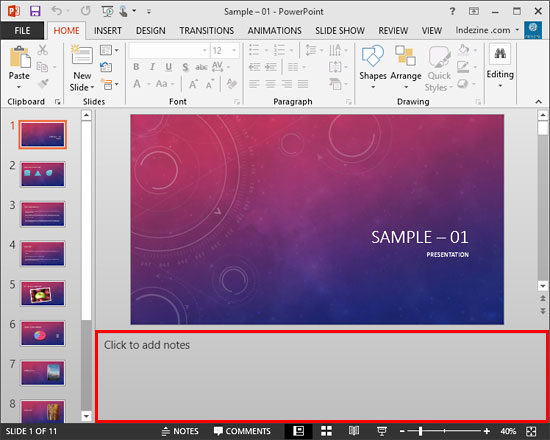
Kathleen Janech, adjunct professor of Biology, adds notes to herself below each Powerpoint slide:

“This way my ideas are right where I need them every year, when I am ready to think about and work on that topic. And if it is something that I realize I need to do weeks in advance, I put a slide note into a lecture earlier in the semester to remind me to work on that.”

For those who aren’t keen on using apps and worry about losing sticky-notes, this is a fantastic way to keep an ongoing record of your teaching observations.  Most presentation software have a designated area for notes, including Google Slides, Keynote, and Haiku Deck.

add notes to Powerpoint by clicking inside the notes area underneath each slide. This area can be expanded or collapsed.

Why bother with all this?

Teaching is a continuous process of exploring, learning, and evolving.  If we fail to prioritize self-reflection, we become stagnant and ineffective.  So do yourself and your students a favor by getting in the habit of routinely evaluating what happens in your classroom.  You don’t have to do it after every class period, or even every week, but don’t wait until the end of the semester.  You’ll forget less if you write it down.  As poet and author Harley King notes: “So much is buried in our lives that we forget what we have learned.”

Google, Google Apps, Innovative Instruction, Portfolio, TLT

Using Digital Portfolios in the Classroom

When I first began teaching, each class involved a major research paper that was due at the end of the semester.  Much to my chagrin, most students never picked up their graded papers, having already left for home and forgotten the assignment entirely.

About four years ago, I was cleaning out my office, and discovered an entire filing cabinet filled with abandoned graded papers.  Seeing this inspired me to alter my signature assignments.  I began reading about the “write to learn” movement, which emphasizes process over product.  I learned about scaffolding assignments, low-stakes writing, journaling, and free writing.  I then participated in a workshop in which I learned more about writing across the curriculum, including the value of student portfolios.  By the way, if this sounds interesting to you, I highly encourage signing up for the Writing Institute hosted by First Year Experience and English professors Chris Warnick and Amy Mecklenburg-Faenger (for College of Charleston faculty only).

Back to portfolios…

Student portfolios are collections of academic work and can be used for pedagogical, professional, or assessment purposes.  In my writing-intensive classes, I decided longitudinal portfolios would be the most meaningful.  This type of portfolio focuses on documenting the entire writing process, including notes, drafts, feedback, and revisions.

Next, I had to decide how students would curate their work. I could ask students to print hard copies of their papers and keep them in three-ring binders. But I have only so many filing cabinets in my office, and I had nightmares about being buried alive by stacks of papers. So I decided a digital option would be best.

There are a multitude of companies which provide e-portfolio services, but most of them require expensive subscriptions.  Thus, I decided to use an application that College of Charleston students, faculty, and staff have free access to: Google Drive.

Google Drive is part of the Google Apps for Education suite, providing cloud-based storage space.  Students can access their Drive from any device that connects to the Internet and files are automatically saved.  For more information about Google Apps for Education, visit the TLT tutorials blog.

At the beginning of the semester, I ask students to create a folder in their Drive specifically for their class portfolio.

Create New Folder


The students then share that folder with me by adding my email address.  Within their portfolio, they can create sub-folders for each writing assignment or each phase in the writing process.  I ask students to upload everything—every draft and peer review, and all the feedback I have offered.  For speeches (my class also includes a public speaking component), I require students to include their outlines, self-evaluations, and links to their videos (I upload videos of their speeches to Kaltura Media Space or an unlisted You Tube channel).

Share Folder Right Click Menu


At the end of the semester, students compose a letter, addressed to me, reflecting on their evolution as a writer and speaker.  I ask students to go through their portfolio and critically examine the strides they have made and the hurdles they still have to clear.  Because they have access to all their work, they can select examples that provide evidence to support their claims about strengths and weaknesses.

In order for this type of reflection to be truly effective, I have learned to build a culture of reflection in my classes.  Throughout the semester, students engage in peer editing, workshopping, and self-evaluation, giving them the practice necessary to successfully complete the final reflection letter.

Using Google Drive is a simple way for students to curate their academic work, share it with peers and faculty, and engage in critical reflection.  From the longitudinal portfolios created for my class, students could cull their best work and create a separate “showcase portfolio” that may be useful when interviewing for internships and jobs.

If you’re interested in learning more about Google Drive, TLT hosts training sessions throughout the year.  Check out the training schedule at tlt.eventbrite.com