Kool Kats Photo of school bus reflection
Pedagogy, TLT, Training Opportunities

Reflecting on the Fall Semester

Your course is over and grades are submitted! Whew, you have time to take a deep breath and kick those feet up on your desk…well maybe. The spring semester is not so far away, and this is a great time to reflect on your teaching and courses. Here are 10 questions to think about:

  1. Review your course goals, objectives, outcomes, etc. Did the course meet your expectations?

  1. When were students most engaged? When were they distracted? Can you determine why?

  1. Did you cover all of the material you had hoped to discuss? Was anything extraneous?

  1. Should you consider re-sequencing any topics?

  1. When were students most confused?

  1. Which topics, discussions, and assignments were most relevant to your course learning goals and objectives? Are there any assessments that should be re-tailored?

  1. Did students come to class prepared? What could be adjusted to improve student preparation?

  1. What were the best and worst moments in the course? Was anything different, unique, or surprising about this semester?

  1. What would you change in future iterations of this course? What could you improve?

  1. Did your student course evaluations surprise you?

Other than reflecting and taking notes on areas to adjust for the upcoming semester, there are a handful of other tasks you can get started on. First, it’s always helpful to have examples of student work. If there’s a project or piece of work from this fall semester that you would like to share with future students, make sure you seek written permission from that student. It’s better to do it now while you still have the contact information for all of your students.

Have you reviewed your teaching evaluations? It’s OK to wait – ProfHacker actually recommends reading teaching evaluations at a later time. Regardless of when you read them, they can sometimes be difficult to interpret. Vanderbilt’s Center for Teaching has an excellent page with resources and thoughts about student evaluations. If you don’t feel like you can use the information from the standard evaluations for reworking your course, you might consider creating your own course evaluation with specific questions about your course. This reflection period is the perfect time to prepare a questionnaire or survey for your future students. You could even create a survey to hand out around midterms.

Lastly, if there is a particular topic or area of teaching that you are struggling with, come up with a strategy for how to address it. Consider attending a TLT Training Session to hear about best practices, setting up an appointment with your instructional technologist, or reaching out to your peers for a discussion about teaching. There are also some great resources available online to help with your teaching – contact your instructional technologist if you need help navigating them. In the long term, you may consider attending an FTI or checking out TLT’s brand new Spring Training initiative. Remember that there are a lot of instructors on campus with a passion for teaching – they are great for ideas and feedback. You could even invite a colleague to sit in on one of your classes to get some honest and constructive evaluations. If that doesn’t sound appealing, as an alternative you could plan to record a class period or lecture to watch on your own. This can be a very enlightening process, and it may give you ideas to keep in mind for future lectures. If this is something you would like to pursue,TLT has equipment you can borrow.

There’s so much that can be done in preparation for your 2015 courses! But, don’t forget to take a break so you come back energized and refreshed for a new group of students.

Faculty Showcase, Information Session, Innovative Instruction, Round Table Discussion, TLT

Giving Thanks for Technology: November Faculty Showcase

At our November Faculty Showcase, we gave thanks for the many ways technology makes us more efficient, productive, and engaging instructors.  Special thanks to Kate Pfile, Mary Ann Hartshorn, and Gayle Goudy for sharing their experiences using instructional technologies.  In addition to learning about innovative teaching strategies, we also collected over 34 pounds of canned goods to be donated in time for Thanksgiving.  Thank you to everyone who contributed!

Amy thanks you for your donations!

During the Showcase, Kate Pfile (HHP) showed us how her students use Popplet (Free; iOS and Web) for a postural assessment assignment.  Popplet is a digital mind-mapping application that allows users to visually capture ideas and make connections between them.  Kate asks her students to take pictures of a friend’s posture, then use Popplet to analyze musculature by identifying the relationships among various body parts.  Popplet can also be used to enhance brainstorming, tease out ideas, plan projects, and organize one’s thoughts, such as when writing a research paper.  Even better, Popplet allows multiple users to collaborate synchronously or asynchronously, so small groups or an entire class could work together.

Example Popplet with Kate's Annotations, made in Goodnotes
Example Popplet with Kate’s annotations, made in Goodnotes

Gayle Goudy (SOTA) shared her experiences with flipping her art history courses.  Flipping has become a hot topic in education, as instructors move lectures outside the classroom while reserving class time for discussion, problem-solving, activities, and group work.  This allows students to accomplish the lower levels of Bloom’s Taxonomy on their own while they work through higher levels of cognitive work with their classmates and instructor.  There are a variety of approaches to flipping your course, whether you want to flip the entire semester or just a handful of classes.  TLT can point you to numerous technology tools that will facilitate this change, including Voicethread and Kaltura Mediaspace.

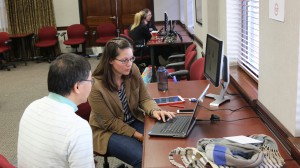
Kate Pfile and Guoli Liu

Mary Ann Hartshorn (TEDU) is a TLT Superstar: she presented at both of our Faculty Showcases this semester!  Mary Ann shared how she uses Google Docs for a collaborative annotated bibliography assignment and the OAKS Discussion tool to encourage community-formation.  To read more, check out our recap of the October Faculty Showcase.

TLT’s instructional technologists also had tech tools to share.  Laura Plotts, instructional technologist for LCWA, showed faculty how Haiku Deck (Free; iOS and Web) provides a fantastic alternative to “death by Powerpoint.”  With Haiku Deck, there’s no chance of presenting slides crammed with bullet points.  Instead, the application forces users to keep text to a minimum and use images to tell their story.  If you want students to learn to speak extemporaneously, Haiku Deck can help wean them off of reading directly from their slides.  Because of its eye-catching designs and graphics, it’s also perfect for video lectures, conference presentations, sales pitches, and keynote addresses.

Kaitlin Woodlief, instructional technologist for SSM, shared a tool that allows instructors to collect real-time feedback without the need for student devices.  Plickers (Free; Android and iOS) makes formative assessment and live polling simple.

Students don’t need iPads or smartphones; instead, each student responds by holding up a card that’s printed with a special image that has letters around the sides.  If, for example, the answer to the question is A, the student will turn the card so that the letter A is on top.

The instructor then uses their smartphone or iPad camera to scan the room and capture the cards.  The app registers the student answers which then can be displayed to the room.  For those who worry about their entire class having devices, or those who simply don’t want to bother with students having to log in or register, Plickers may be just what you’re looking for.

Trying out Plickers!


If you’d like to learn more about any of these tools and strategies, please contact your instructional technologist.  Thank you to everyone who stopped by!  Be on the look-out for our Spring Faculty Showcases, including a few new, exciting events!

1-1-1, Faculty Showcase, Innovative Instruction, Round Table Discussion, TLT

Student Zombies No More: Faculty Showcase Recap

Your students will be zombies no more!

A “spooktacular” time was had by all at the TLT Faculty Showcase!  A hearty thank you to the faculty who shared their innovative teaching strategies:  Gustavo Urdaneta Velasquez, Mary Ann Hartshorn, Laura Penny, Sherry Wallace, and Lancie Affonso.  Not only did we learn how to more effectively engage our students and manage our classes, we also played Plinko and enjoyed trick-or-treating!

Plinko!
Plinko!


For those who couldn’t attend, the following applications were discussed:

Google Docs (Free; Web, iOS, Android) is a cloud-based word processor that allows users to create and share work from any device that connects to the Internet.  Users can work on the same document both synchronously and asynchronously, making it ideal for collaborative projects.  Mary Ann Hartshorn’s students use Google Docs to crowd-source references for research papers.  The students each contribute to the annotated bibliography then collectively edit the document for proper APA formatting.

To establish community and encourage communication, Mary Ann asks her students compose a “Where I’m From” poem at the beginning of the semester, which they share in the OAKS Discussion boards.  In addition, throughout the semester, students take turns as discussion leaders charged with facilitating the boards. Mary Ann has found this continuous interaction throughout the semester encourages students to complete the assigned readings, engage in peer teaching, and establish relationships with one another.

Using Google Docs and the OAKS Discussion tool

What student wouldn’t love to play games in class?  Kahoot (Free; Web) is a student response system founded on game-based digital pedagogy.  Gustavo Urdaneta Velasquez tests his students’ understanding of Spanish vocabulary and grammar by creating quizzes that incorporate text, images, and video.  Using any device with a Web browser, students play against each other hoping to top the leader board.  Gustavo is able to see how well his students understand course content and use the students’ answers to provide “just in time” feedback.

Lancie Affonso starts his “flipped” classes by checking his students’ pulse.  LinkedIn Pulse (Free; Web, iOS, Android) is an RSS aggregator that exposes students to industry-specific resources and professional networking.  Students get up-to-the-minute news from industry professionals, business publications, and news media, which inspire lively class discussions.

If you’ve ever wished you could scribble all over PDFs or Powerpoint slides while lecturing, Laura Penny has found the app for you.  Goodnotes ($5.99; iOS) is a note-taking, annotation, and digital whiteboard app.  Using the external display feature, Laura projects her iPad screen to the class and annotates while she lectures.  She can then export those annotated slides and share them with her students.

Socrative (Free; Web, iOS, Android) is a student response system that helps instructors assess student understanding through quizzes, polls, and games — no clickers or subscriptions required!  Sherry Wallace uses Socrative in her art history classes to evaluate students’ knowledge based on their exploration of websites such as the Louvre and Metropolitan Museum of Modern Art.  Socrative captures students’ responses in real-time, which encourages discussion and allows Sherry to clarify confusion.

Looking for a way to deliver content while encouraging discussion, especially in an online class?  Instructional Technologist, Chris Meshanko, shared the perfect tool to accomplish these goals — Voicethread (Free; Web, iOS, Android) is a cloud-based application that allows users to upload, share, and discuss documents, presentations, images, audio files and videos.  Chris has devised twelve fantastic ways to integrate Voicethread into your classes including icebreaker introductions at the beginning of the semester, guest lectures, syllabus question & answer, peer evaluation, and a variety of formative assessments. Making Voicethread even better are the College’s site license and its integration with OAKS.

If any of these tools sound promising to you, contact your Instructional Technologist to learn more.

We hope you’ll join us for the November Faculty Showcase on 11/20/14 from 11:00-12:00 in Tate Center 202.

Your fun-loving Instructional Technologists: Mendi, Chris, and Kaitlin
classroom discussion image
Pedagogy, TLT

Tips for improving classroom discussions

It’s a common scenario: an instructor asks a question in front of a classroom packed with students and…crickets.

I think we’ve all had one of those classes, either as a student or an instructor. I literally heard crickets during a discussion I was leading last fall, and I am not using literally by its new figurative definition. Crickets had actually escaped from a nearby lab, and they found a convenient hiding space under the teacher station in my room! It made for a more dramatic silence.

There are other issues that may come up while trying to facilitate a discussion in class. The response to a question from the instructor may not be silence, but comments from the same few students dominating the discussion. Perhaps the discussion only progresses to the point of covering a topic superficially.

How can these problems be avoided during your next class discussion? While there are no simple cure-all solutions, there are strategies that can help you. Hopefully there is a tip here that you will find useful as you plan your next discussion with students:

  1. Be prepared

It seems obvious that instructors should prepare discussion questions in advance, right? It’s not just about having a few questions jotted down before class. It’s important to think about what you’re asking and what responses you’re expecting from students. Make sure you include multiple types of questions. Some questions should be basic and just ask for factual responses, but you should also be prepared with questions asking for interpretation, evaluation, or reasoning. Be careful to limit the number of yes/no-type questions, as that can disrupt the flow of the conversation.

  1. Encourage student preparation

Ask students to prepare a handful of their own questions before arriving in class. If you are discussing a reading assignment, ask students to write a short summary. Regardless of the type of discussion, give students adequate time to recall the material and collect their thoughts before starting the dialogue. This is something that is easy to overlook, and we should remember that many students may be rushing to class straight from work or an intense exam. Furthermore, students will be more likely to prepare if you emphasize the importance of participation by including expectations in your syllabus.

  1. Create a supportive environment in the classroom

One way to get things rolling at the start of the the semester is to start with an icebreaker. You may even provide students with the question prior to class so that they don’t feel put on the spot. During the first few discussions, putting the students into pairs or groups to answer questions and report back may ease the transition for student not accustomed to talking in class. If students are still hesitant to participate and the conversation stalls, be prepared to try out some anonymous response platforms, like Poll Everywhere, to get students comfortable. During the class conversation, provide positive reinforcement by affirming student input (verbally and nonverbally), and carefully correcting erroneous contributions. You can also help set the tone by using student names and rearranging the seating in the room (if possible). Students will feel heard if you repeat or summarize what they have said, which has the bonus of clarifying the comment and helping other students hear what was said.

  1. Be sure the material is suitable to discussion

Typically, textbooks are not good sources for in class discussion. Make sure the topic or reading involves ample viewpoints so that students have plenty of ideas to bring up during the dialogue.

  1. Consider cold calling

Cold calling, or calling on students in class when they have not volunteered, works well for some instructors. If you have fostered a supportive environment or are teaching advanced students, cold calling may work for your class. Warn your students that this may happen during discussions so that they come to class prepared. While this practice is somewhat controversial (just type “cold calling classroom” into Google and you will see a variety of articles and opinions), some research supports this practice.

Dear TLT
Dear TLT, Innovative Instruction, instructional technology, Pedagogy, TLT

Introducing “Dear TLT” – Submit Your Questions Today!

Have you ever told your students not to be afraid to ask questions because their classmates probably have the same question(s)?  Well, professors shouldn’t be afraid to voice their queries either!  It’s likely the questions you have about implementing instructional technologies are shared by your colleagues.  So we are starting an online community, called “Dear TLT,” to answer your questions, inspire discussion of best practices, and encourage interdisciplinary collaboration.  Much like “Dear Abby,” your instructional technologists will respond to your questions with advice, suggestions, and troubleshooting tips.

Dear TLT

To submit a question for TLT, please complete the following form:  http://goo.gl/n1N2tq.

We look forward to corresponding with you!

Please note: Questions will be answered on a first come, first-served basis and added to TLT’s blog as space permits. If you need an immediate response, please contact your instructional technologist.

1-1-1, Faculty Showcase, Faculty Technology Institute, Innovative Instruction, Pedagogy

Tackling challenging concepts with problem-based learning in the classroom

Our guest blogger is Elizabeth Burton, an adjunct professor in the Department of Biology. Elizabeth was a participant in the 2013 Summer FTI.  This post is a report on her experience using problem-based learning in her courses.

In the classroom, many students have trouble translating the facts into action.  This is particularly true in the non-majors introductory biology classes that I teach.  Many of these students enter into the classroom with little knowledge or understanding of biology, with many having no interest at all in the subject.  Most only take this class as a general education requirement.  I have chosen to incorporate problem-based learning into the classroom to provide students with a way to translate abstract ideas into functional scenarios.  This is of particular importance in biology because many of these biological concepts translate into proper functioning of the human body.  From my experience, both personally and as an instructor, I have found that it is easier to understand a tough concept when you are “forced” to work through it.  Students are more interested in the topic when you relate it to something familiar to them or something that is more interesting than a cell, such as a disease.

One example of problem-based learning from my classroom is based around the concept of mitochondrial functioning in cellular respiration.  This concept is probably one of the most difficult for students to understand because everything is explained at a minute level.  In this section, I give a lecture on the basics of the electron transport chain in the mitochondria in one class period.  During the next class period, I reinforce this material through the use of a case study.  The one that I use is from the National Center for Case Study Teaching in Science (http://sciencecases.lib.buffalo.edu/cs/), which is a great resource for case studies in all sciences, not just biology.  In this case study we follow the story of Connor, who is a wrestler hoping to lose weight and get down to a lower weight class for competition.  His friend suggests taking a weight loss drug that is available from foreign internet pharmacies but is banned in the United States.  Through this case study, the students dissect the mechanism behind how this weight loss drug works, looking specifically at mitochondrial functioning and why this drug is banned in the US.  Once the students figure out the mechanism by analyzing actual scientific data, I then show them additional substances that have a negative impact on mitochondrial functioning such as cyanide.

From my experience, more students understand the basic concepts after working through a case study problem.  In the classroom, I usually use one case study per unit to reinforce the material from lecture and multiple questions during the lecture.  I have had positive feedback from students on the use of problem-based learning in helping them understand the material.  The in-lecture questions also allow the students to think about the material that we have not yet covered to see if they can find the answers.  Sometimes I ask the question after covering a topic to reinforce understanding.  Frequently, students retain lecture material if they were “forced” to think about it during class instead of frantically writing notes.  While this does take away from the amount of material that I am able to cover, the material that we are able to cover during the semester is understood and retained better by most students.  Overall, I have found problem-based learning to be a welcome addition to the classroom that has facilitated a greater understanding of complex biological ideas.

Coterminal Angles
1-1-1, Innovative Instruction, TLT

Faculty Guest Post: Echo360 to (partially) Flip a Math Classroom

Today our guest blogger is Dr. Jason Howell, an assistant professor in the Department of Mathematics. Please note that as of August 2015, Echo 360 is no longer available to CofC faculty as a campus license. Mediasite Desktop Recorder is the new replacement allowing for media creation and media sharing.


I was very excited to learn that I was selected to attend the Spring 2013 Faculty Technology Institute as I was very interested in learning about some of the latest and greatest innovations that could help me improve my overall effectiveness as a teacher.  Having taught college math courses since 1997, my teaching style and techniques evolved to include many software and hardware tools, including programmable calculators, mathematical software, and even lecturing with a tablet PC, but I felt that I was not fully taking advantage of what was currently available in terms of instructional technology.  The TLT staff did an excellent job and the FTI showed me lots of new tools that were available to enhance student learning.

One of the instruction techniques that was covered in the FTI was the inverted, or “flipped” classroom, in which students are responsible for absorbing new lecture content outside of class meetings.  This way, class meetings can be devoted to more interactive discussions about the course concepts or, as is often the case with math courses, working more problems in class.  One of the tools introduced at the FTI for this purpose was Echo360 Personal Capture.

This software will record your desktop, microphone, and webcam (optional) all together to help you create lectures or presentations.  I decided that this would be a great tool to try out for myself – if I can get my students to learn some basic ideas or concepts though watching a video outside of class, I could then devote more class time to working problems, which students are always clamoring for!  I was teaching Precalculus (MATH 111) at the time, and we were getting ready to cover trigonometric functions, so I decided that my first experiment would be to create a video on finding coterminal angles and evaluating the sine and cosine functions at these angles (if you want to know exactly what I’m talking about, watch the video below!).

The Echo360 software was very easy to download and install on my old Toshiba Tablet PC (still running Windows XP Tablet) and I was up and running in no time. This is a relatively old computer but I really like it for writing – I’m left-handed so writing on a tablet doesn’t always produce good results, and I’ve tried many tablets but this one works best for me.  I started by creating a worksheet that was only partially complete – and my goal was to work through the worksheet on the tablet while Echo360 captured the screen and my voiceover.  I created the worksheet and produced a PDF version, and I annotated the PDF using a program called PDF Annotator (http://www.ograhl.com/en/pdfannotator/, I’ve used it for years).  Meanwhile, my discussions of the worksheet were recorded using a USB microphone, and the Echo360 software was launched to capture everything together.

One disadvantage of Echo360 software is the inability to splice two captures together to make another.  While this might seem annoying at first, it forces you to do two (actually good) things:

  • You really need to rehearse your presentation of the material before you attempt to record, as you don’t want to have to redo the whole thing once you’re a few minutes in. This is good practice anyway, just as going over your lecture notes thoroughly/rehearsing your lecture helps you become more effective in the classroom.
  • You do not want to set out to create really long videos – in fact, it’s probably a good idea to break a long lecture into a series of shorter videos.  Depending on your discipline, a few short videos may be better to retain student attention, and they definitely will be more convenient for the students to work into their out-of-class schedules.

After a few mulligans I was finally able to record two videos that split a three-page worksheet into two coherent mini-lectures.  The two videos can be viewed here:

Coterminal Angles: https://cofc.mediaspace.kaltura.com/media/Coterminal+Angles/1_i9xsilvj

Evaluating Trig Functions: https://cofc.mediaspace.kaltura.com/media/Evaluating+Trig+Functions/1_glewi067

Math Worksheet for Echo360 Lectures

**To access these videos, click or copy the link into your browser, login to Kaltura with your Cougars username and password, then click the link AGAIN to be taken to the video**

Once you create your videos using Echo360, you can share them on the college’s Echo360 server, and you can post a link in your OAKS course to the video. However, I don’t like the fact that Flash must be enabled in order for the videos to be streamed from the server – I find this quite limiting, as many students have iPads, iPods, or iPhones that will not play Flash content.  To work around this, I downloaded the m4v file and converted it to an mp4 movie file.  I then uploaded the MP4 files to Kaltura so students can access and play them on any device.  My MATH 111 students really liked the videos, especially the fact that they could rewind and play certain parts over and over – something they certainly can’t do in class!

Although these are the only videos I have done so far, I am planning on doing more as soon as I get time.  I think they could really help in many courses, such as Calculus and Discrete Structures.  In summary, the FTI was a great opportunity to learn some new and innovative ways to enhance student learning, and I successfully used Echo360 to create some lecture content for my students to view outside of class.

work-struggle-with-technology-Veer
Assessment, Classrooms, Innovative Instruction, instructional technology, Pedagogy, TLT

A Plan of Attack for Implementing Technology into Your Instruction

work-struggle-with-technology-Veer
Image Credit: Veer

Here at Teaching, Learning, and Technology part of our mission is to support, develop, and educate faculty in the integration of educational technology into pedagogy and assessment.  Our goal for doing this is that it will enhance student learning and promote effective or innovative practices.  Lately, I have met with several members of the College of Charleston faculty who are interested in getting started with incorporating more technology into the classroom or starting to look at it for the first time.  It can be daunting when faced with the choices of technology tools that are on the market.  Which one is the best?  Can my students use it?  Do I really HAVE to use technology to get my point across?

Here are our top 5 tips to consider when you are looking at implementing educational technology into your courses:

  • Above all, technology should be chosen to ENHANCE instruction.  Too often faculty members find a new tool and try to come up with a way to use it in class, which is not necessarily a bad thing and can lead to some innovative instruction.  However, trying to force a tool to fit into your course simply because it’s new and shiny may not be the best way to introduce technology into your courses.  Remember, the instruction should be used to structure tool choice rather than using the tool to structure your instruction.


  • Define what you want the tool to accomplish and the relevant features. There are tons of tools out there to achieve your goal for any action.  Just do a quick Google search for apps for managing a to-do list (http://bit.ly/1oquZP2)! The first step to a purposeful integration is to reflect on your current teaching practices to see where your lessons could be enriched with a technological tool.  Next, define what you want the tool to be able to do and what are your “deal breaker” features, or features that the tool absolutely must or must not do.  This will help to narrow your search.  Of course, when it comes to this, you can always have a conversation with your neighborhood, friendly Instructional Technologist to help with the narrowing and research process!


  • Plan ahead and test it out.  Whenever you are trying a new instructional technology tool, it may take a while for you to feel comfortable with using the tool or to get it set up the way that you want.  Like anything, this comes with practice and exposure to the product.  Make sure that if you want to use a new tool in your courses that you give yourself at least 2 weeks to really get to know the app or tool before implementing it with your students.  Also, try the tool in multiple locations and using multiple platforms.  For example, try using a web based tool both on and off campus, in the classroom where you want to work with it, and on Chrome/Firefox/Internet Explorer/Safari to make sure everything displays and functions the same way.  Nothing is more frustrating than getting in front of your students to facilitate a wonderful lesson planned with technology and have it not work the way that you intended.  Which leads me to our next point…


  • Have a backup plan just in case.  In a perfect world, we would all be able to walk into any classroom and have every lesson go smoothly…the students are actively learning, all of the technology functions perfectly, and you leave class with the high of knowing that you have helped to mold young minds into the way of the future.  Snap back to reality!  There are too many variables to have that utopian classroom be a constant, so as effective instructors we need to be prepared with various instructional strategies to help our students meet the end objectives for the lesson.


  • Don’t be afraid to try something new!  Yes, things can go wrong and it’s scary to change from the way that you may have done things for years.  It can also be amazing and you can see growth, access, and engagement with material that you never thought possible.  Be honest with your students about your new endeavors and ask them for their feedback.  When the students know that you are learning and that you value their opinions about what is going on in the classroom, it creates a sense of ownership within the cohort of learners in your course.

One faculty member on campus told me that he tests his material for his online courses in his face to face course and has his students rate them.  It helps to shape the instruction and trouble shoot for the next running of the course.  Another faculty member in the Department of Communication told his students that they were going to try a new tool in the class and that it was the first time he had ever tried to use this tool, so they were going to experience it together.  The students responded to his openness and they ended up learning from each other and allowing this particular faculty member to branch out and try more technology tools to engage his students.


When you start to look at integrating new tools into your lessons it may seem like there are so many options and only one of you, but keep in mind that there is always safety in numbers.  Talk to your colleagues to see what they are doing and what they have found to be successful and what has not.  You can learn just as much from a failed attempt as you can from a successful one.  Attend workshops and training sessions to help with your comfort level.  In addition, you can always contact your Instructional Technologist to help with an individualized plan of attack!

Pecha Kucha Night by Chrys Rynearson
instructional technology, Pedagogy, Presentation, Research, Share

Pecha Kucha in the Classroom

Pecha Kucha is a simple presentation format devised by Astrid Klein and Mark Dytham where you show 20 slides or images, each for only 20 second.  The images or slides advance automatically to keep you on time and you can only talk about each slide or image while it’s being displayed.  Designed to keep presentations short and to the point, each presentation is only 6 minutes and 40 seconds long!

Why use it in your classroom

The goal of pecha kucha is to encourage the presenter to be concise but also a bit more creative and informal.  It’s suggested that the presentation consist mainly of images, photos, or graphics with little to no text.  These images should advance your story and emphasize your points. and The absence of bulleted text tends to steer the speaker more toward story telling and conversation than a rehearsed and robotic presentation.  The time constraint is great for student presentations because twenty seconds is long enough to make a solid point but not enough to prattle.  The pecha kucha time and slide constraints prevents the student from mentioning everything they could find on the topic in hopes that they hit upon the point you wanted them to make.  This encourages the presenter to know the topic well enough to distill what is important and needs to be covered in the 20 slides.  Lastly, when the fast-paced presentation is over the speaker(s) then open the floor for questions and dialogue with their audience, further allowing them to demonstrate their understanding of the topic.

How to use it in your classroom

There are some basic rules to pecha kucha.

20 for 20:  I’ve already mentioned that an entire presentation must consist of 20 slides, no more, no less.  Each slide is only allowed to remain on the screen for 20 seconds so it’s important to know how to create an autoplay slideshow.  You can find short video tutorials on how to create pecha kucha style presentations in Keynote, PowerPoint and Prezi at then end of this post.

Images over Text:  Try to use images that advance your story and illustrate your points.  When using words steer clear of bullets and use phrases that have an impact and represent the essence of your point.

No transitions or animation:  Avoid slide transitions and fly-in text.  This eats up time and detracts from the focus of this fast-paced presentation style.

No video or audio:  While you can add audio and video files to your presentations they need to fit into the 20 second time frame and normally don’t work well with this presentation style.

Rehearse, rehearse, rehearse:  While this is meant to be more informal and conversational you must make sure you get your important points across and you won’t be able to do that successfully if you don’t practice.  20 seconds is a short time and every slide where you go over that time forces you to speed up on all subsequent slides to make it up.  Practice is critical.

Jennifer Welsh in History has used pecha kucha with her students and here’s what she says:

It was a very interesting experiment (for me, at least; not sure how the students felt), and one I’d like to do again using what I learned the first time. I think that next time, I would watch some examples with the students in class, and talk more about the structure of a Pecha Kucha-style presentation, as well as what makes a good (or bad) PowerPoint slide. The main problem students had was putting all their text onto their slides and then trying to just read everything on there. That doesn’t work with the format, since Pecha Kucha doesn’t spend that much time on each slide. The best students were very engaging, and extremely creative in their work, incorporating interesting maps and images, and working well with minimal notes.

If you are interested in reading more about pecha kucha in the classroom go to Richard L. Edwards’ blog, Remixing the Humanities.  He wrote a post entitled Pecha Kucha in the Classroom: Tips and Strategies for Better Presentations and it is one of the resources that I used for this post.

If you would like to learn how to create pecha kucha style autoplay presentations I have created some basic video tutorials for you and your students:

PowerPoint – http://youtu.be/l9zxNTpNMLo

Keynote – http://youtu.be/KrYTB3NpNM8

Prezi – http://youtu.be/BSQlsqZWtV0

Resources

Edwards, Richard L. “Pecha Kucha in the Classroom: Tips and Strategies for Better Presentations.” Remixing the Humanities. N.p., 03 Nov. 2012. Web. 28 Aug. 2012. <http://remixhumanities.wordpress.com/2010/11/03/pecha-kucha-in-the-classroom-tips-and-strategies-for-better-presentations/>.

Jones, Jason B. “Challenging the Presentation Paradigm (in 6 Minutes, 40 Seconds): Pecha Kucha.” ProfHacker. The Chronicle of Higher Education, 02 Nov. 2009. Web. 28 Aug. 2012. <http://chronicle.com/blogs/profhacker/challenging-the-presentation-paradigm-in-6-minutes-40-seconds-pecha-kucha/22807>.

“PechaKucha 20×20.” PechaKucha 20×20. N.p., n.d. Web. 28 Aug. 2012. <http://www.pecha-kucha.org/>.

Rynearson, Chrys. Pecha Kucha Night Charleston. 2009. Photograph. Charleston. Flickr. Web. 28 Apr. 2012. <http://www.flickr.com/photos/chrys/4035453312/>.